The journal follows your existing save in this browser. Unchecking a discovery also removes it from the journal.
02 / THE ADVENTURE, STEP BY STEP
Every passage. At your own pace.
Super NES quest walkthrough, essential puzzles, floor plans and boss strategies. The proposed order is classic; some dark dungeons can be done differently.
0 / 136 steps completed
01
LIGHT WORLD · The rain, the castle and the secret passage.
A Rainy-Night Rescue
Before you set outNo items required
RewardsSword, shield, lantern and Sanctuary Heart Container
Open the chest in the house to take the lantern. Get out into the rain and head to the castle to the north.
In the eastern garden, lift the lone bush and drop into the hole. Talk to your uncle to receive a sword and shield, then follow the underground passage into the courtyard.
Enter the castle, go down to the dungeons and collect the keys from the guards. Take the boomerang to immobilize enemies.
Throw pots at the ball-and-chain guard outside Zelda’s cell, or strike between his attacks. Collect his Big Key, unlock the prison cell and speak to Zelda.
Return to the throne. Push the furniture to the right; cross the dark passage. Take the key from the chest, then the key from the rat in the sewers.
Push the central block of the passage upwards. In the last room, pull the lever on the right. Listen to the wise man and take the heart container.
A hint for this chapter +
The path to Zelda begins next to the guarded door.
Reveal the solution
Go around the castle to the right and lift the isolated bush. After the rescue, push the piece of furniture behind the throne from its left.
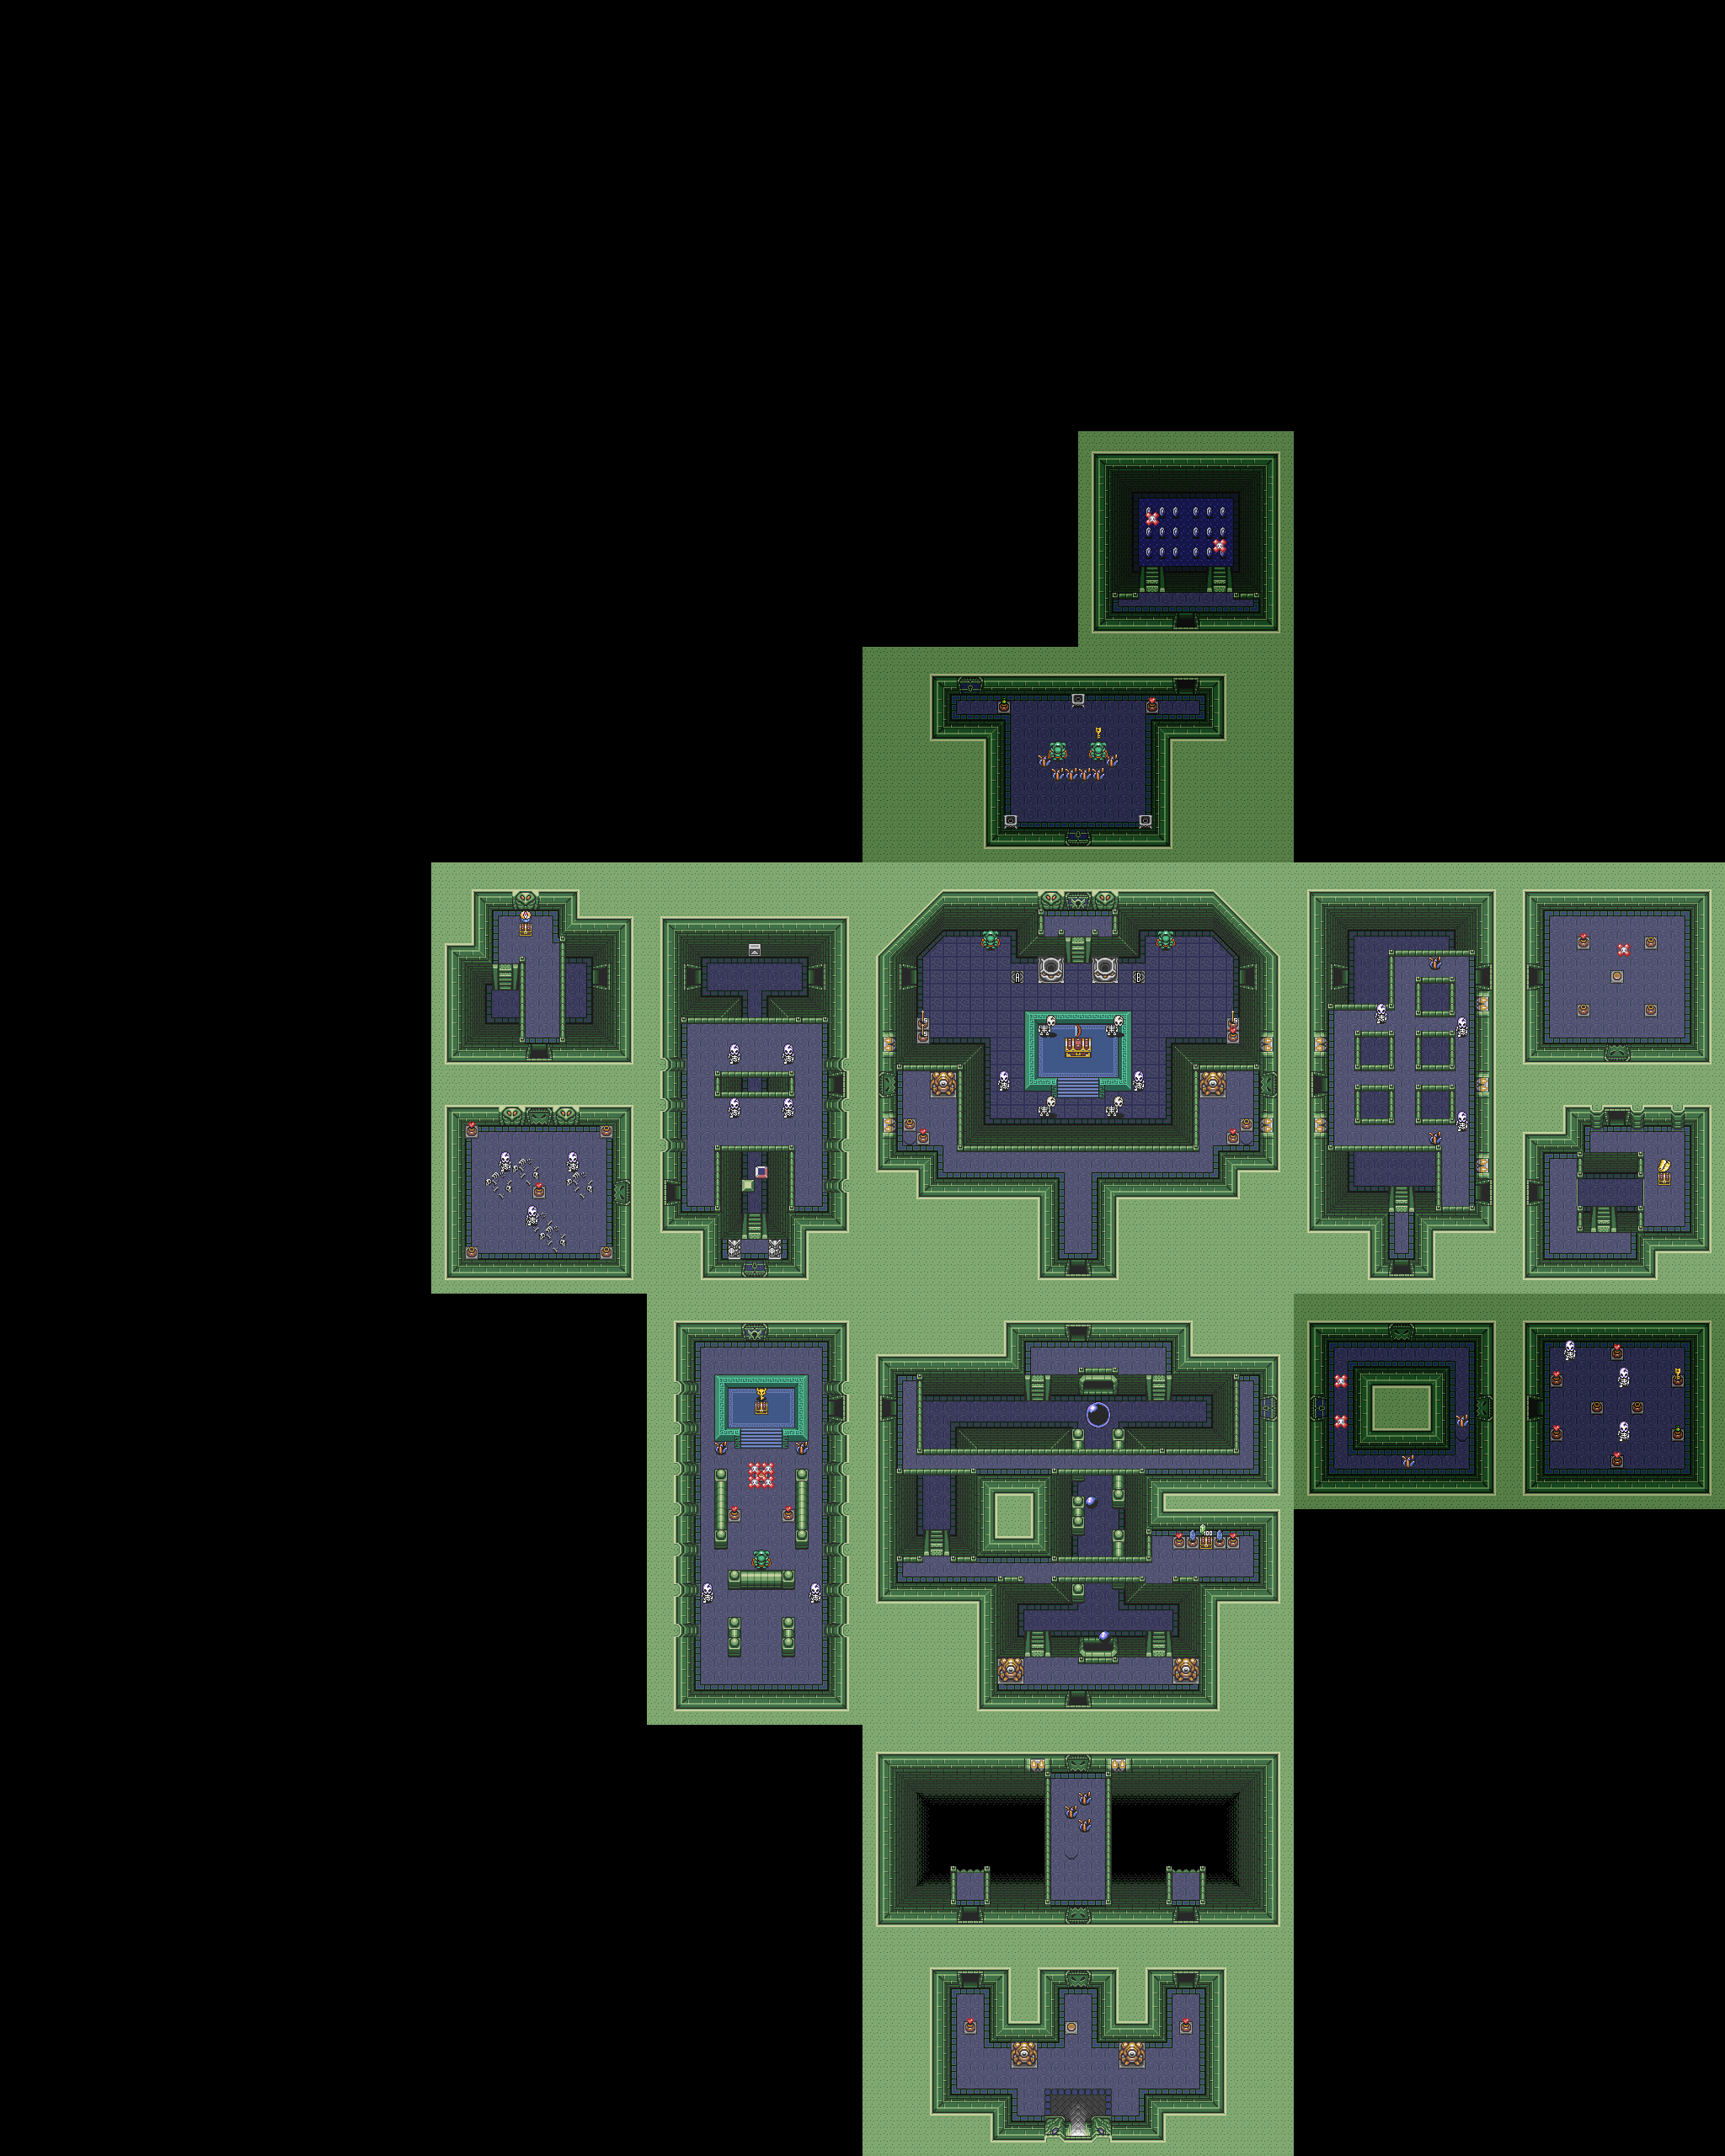
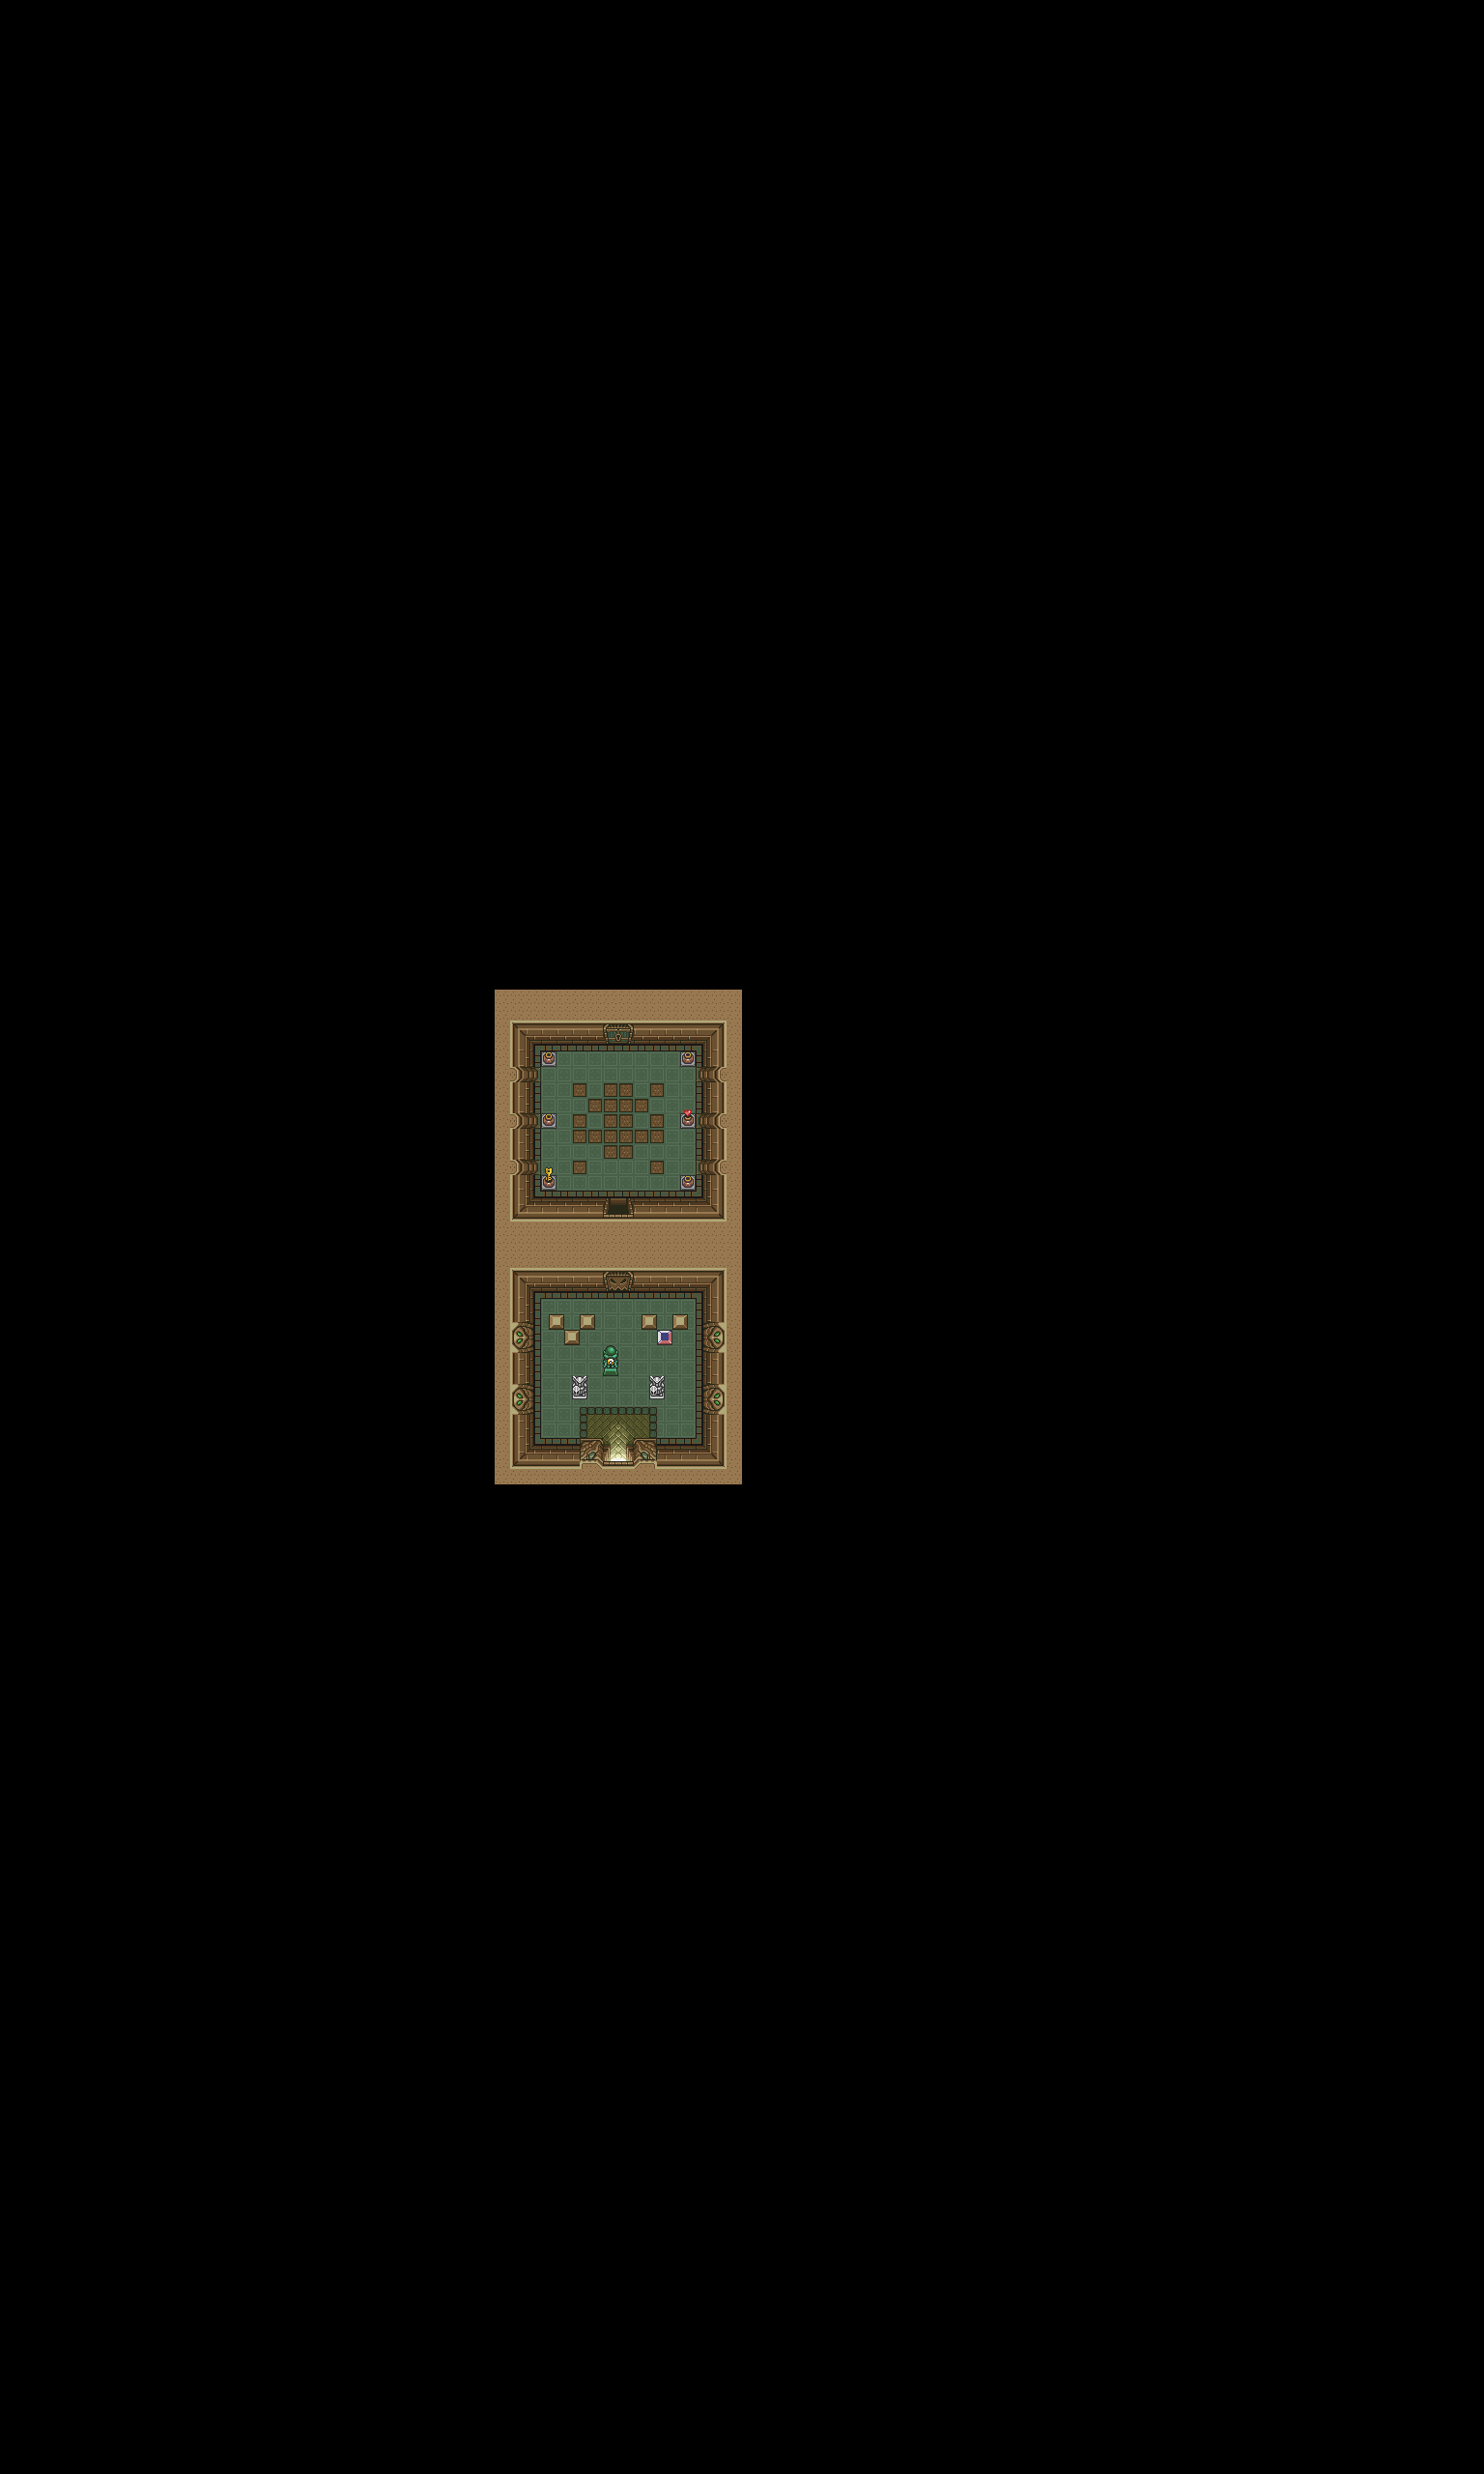
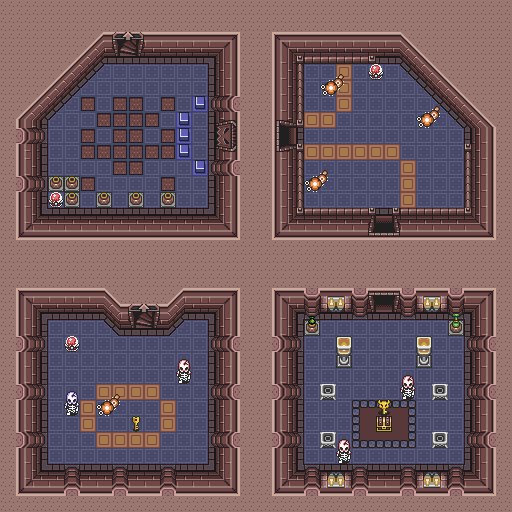
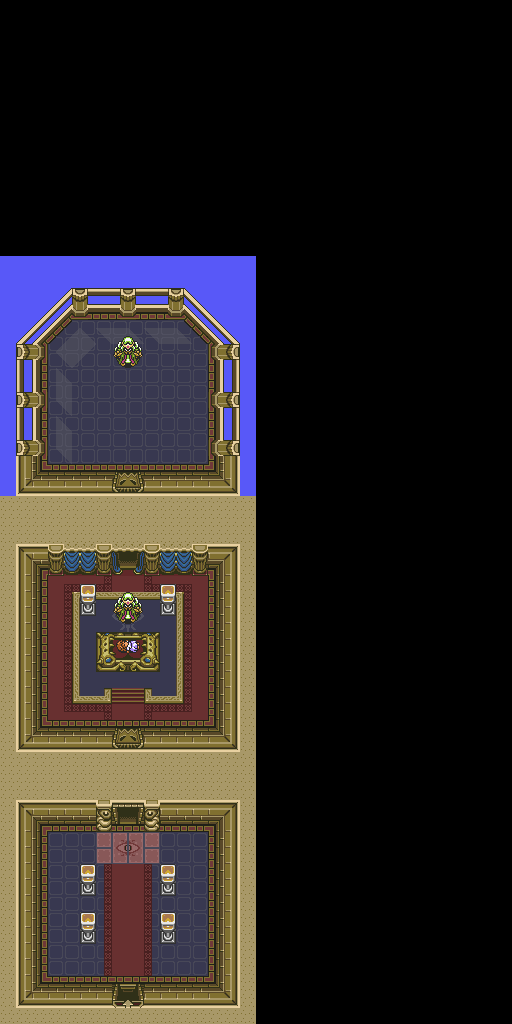
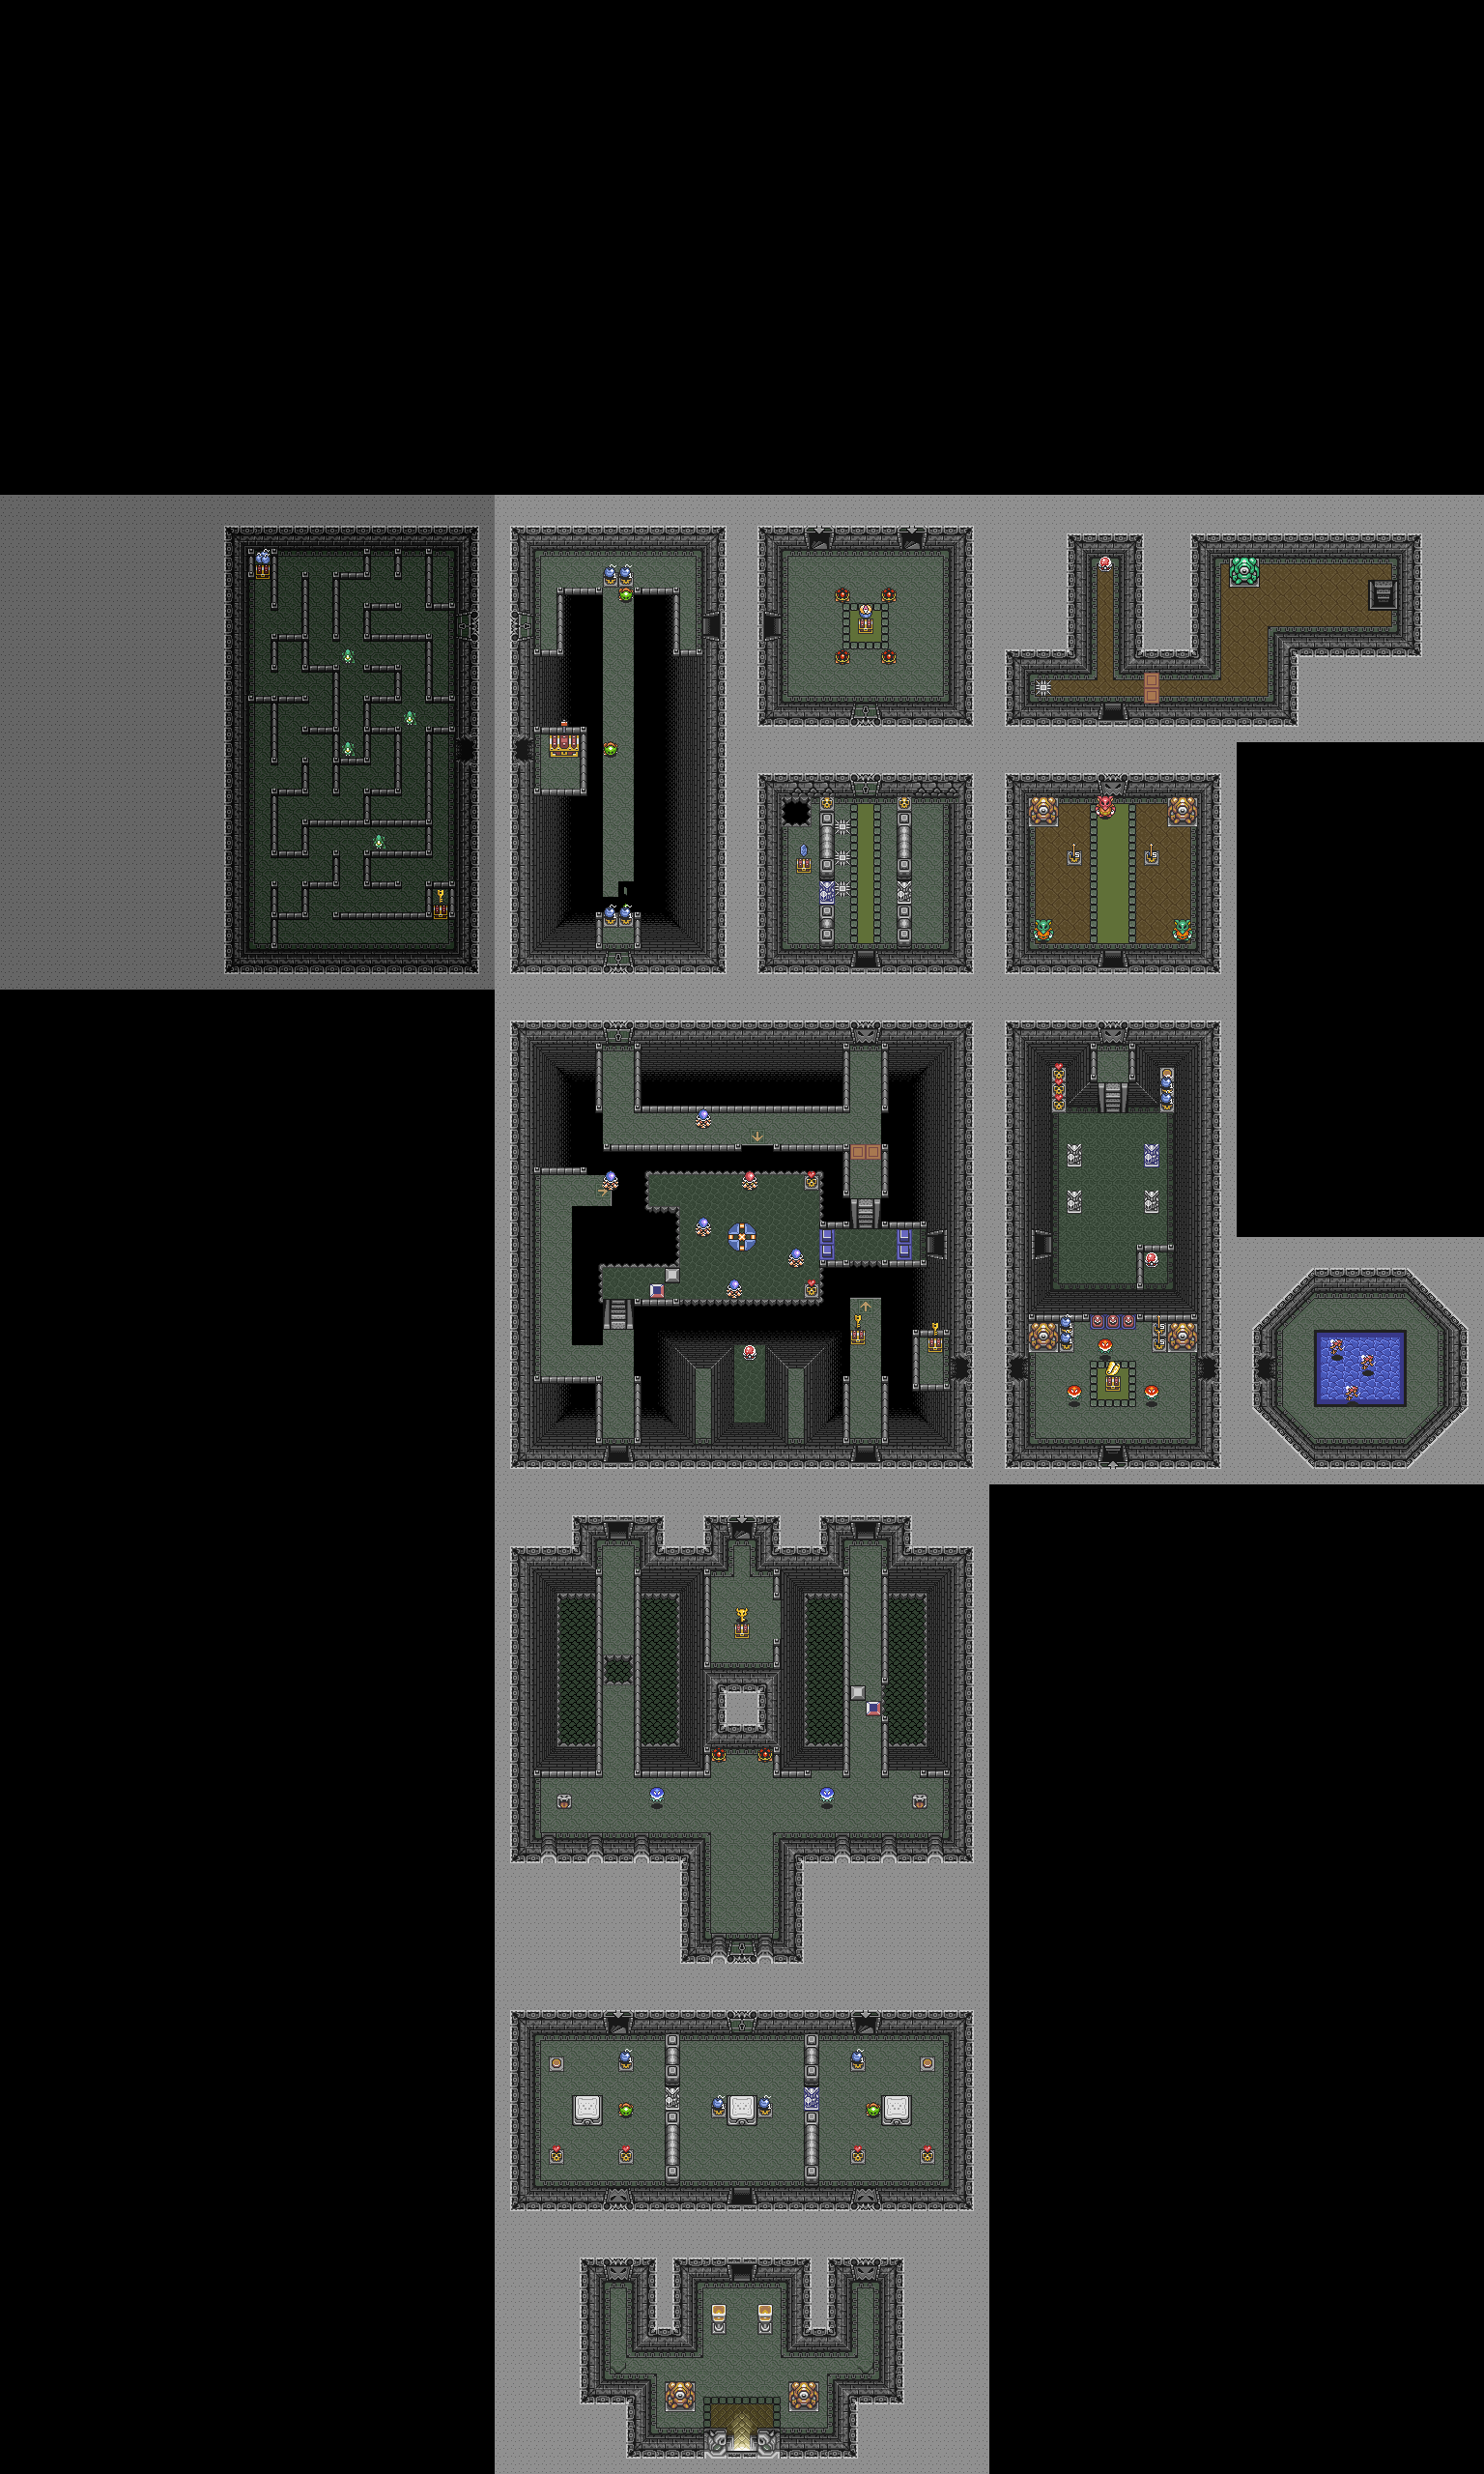
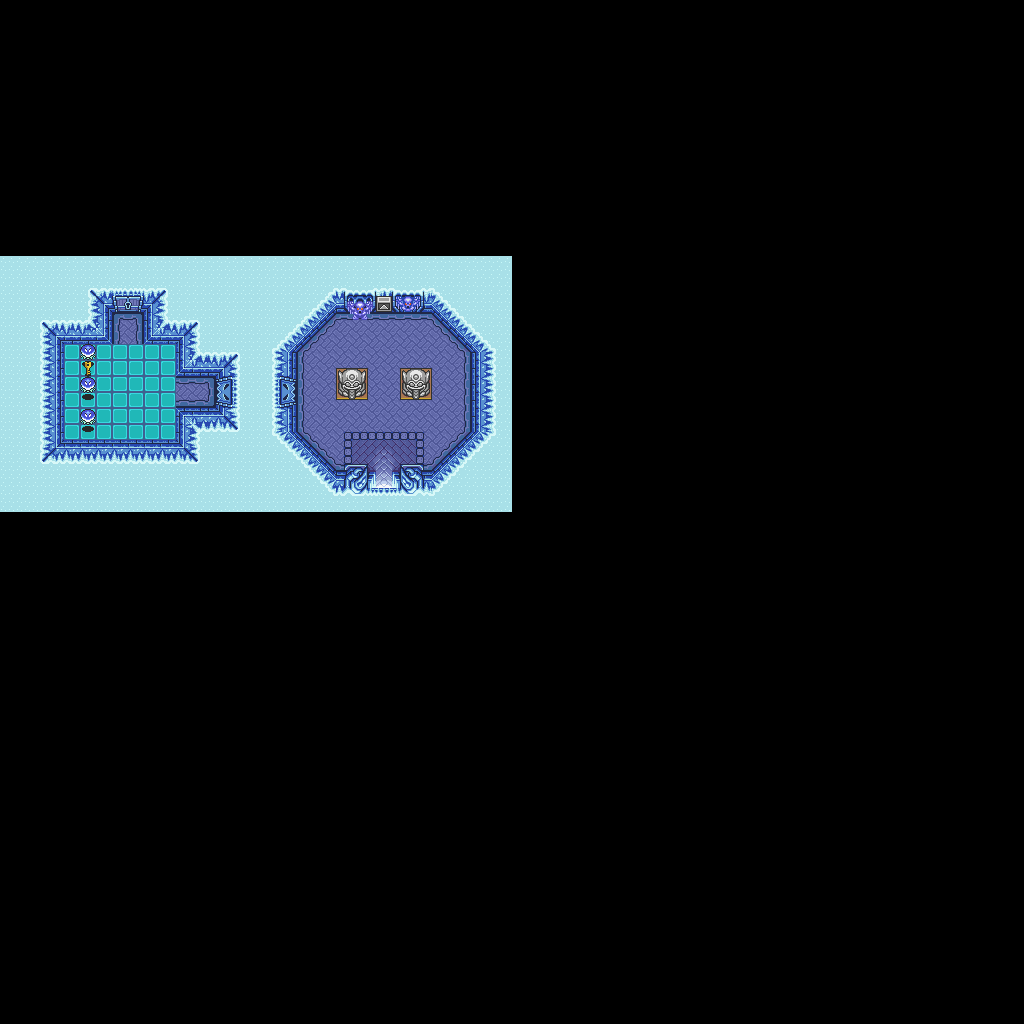
Dungeon floor maps 5 floors
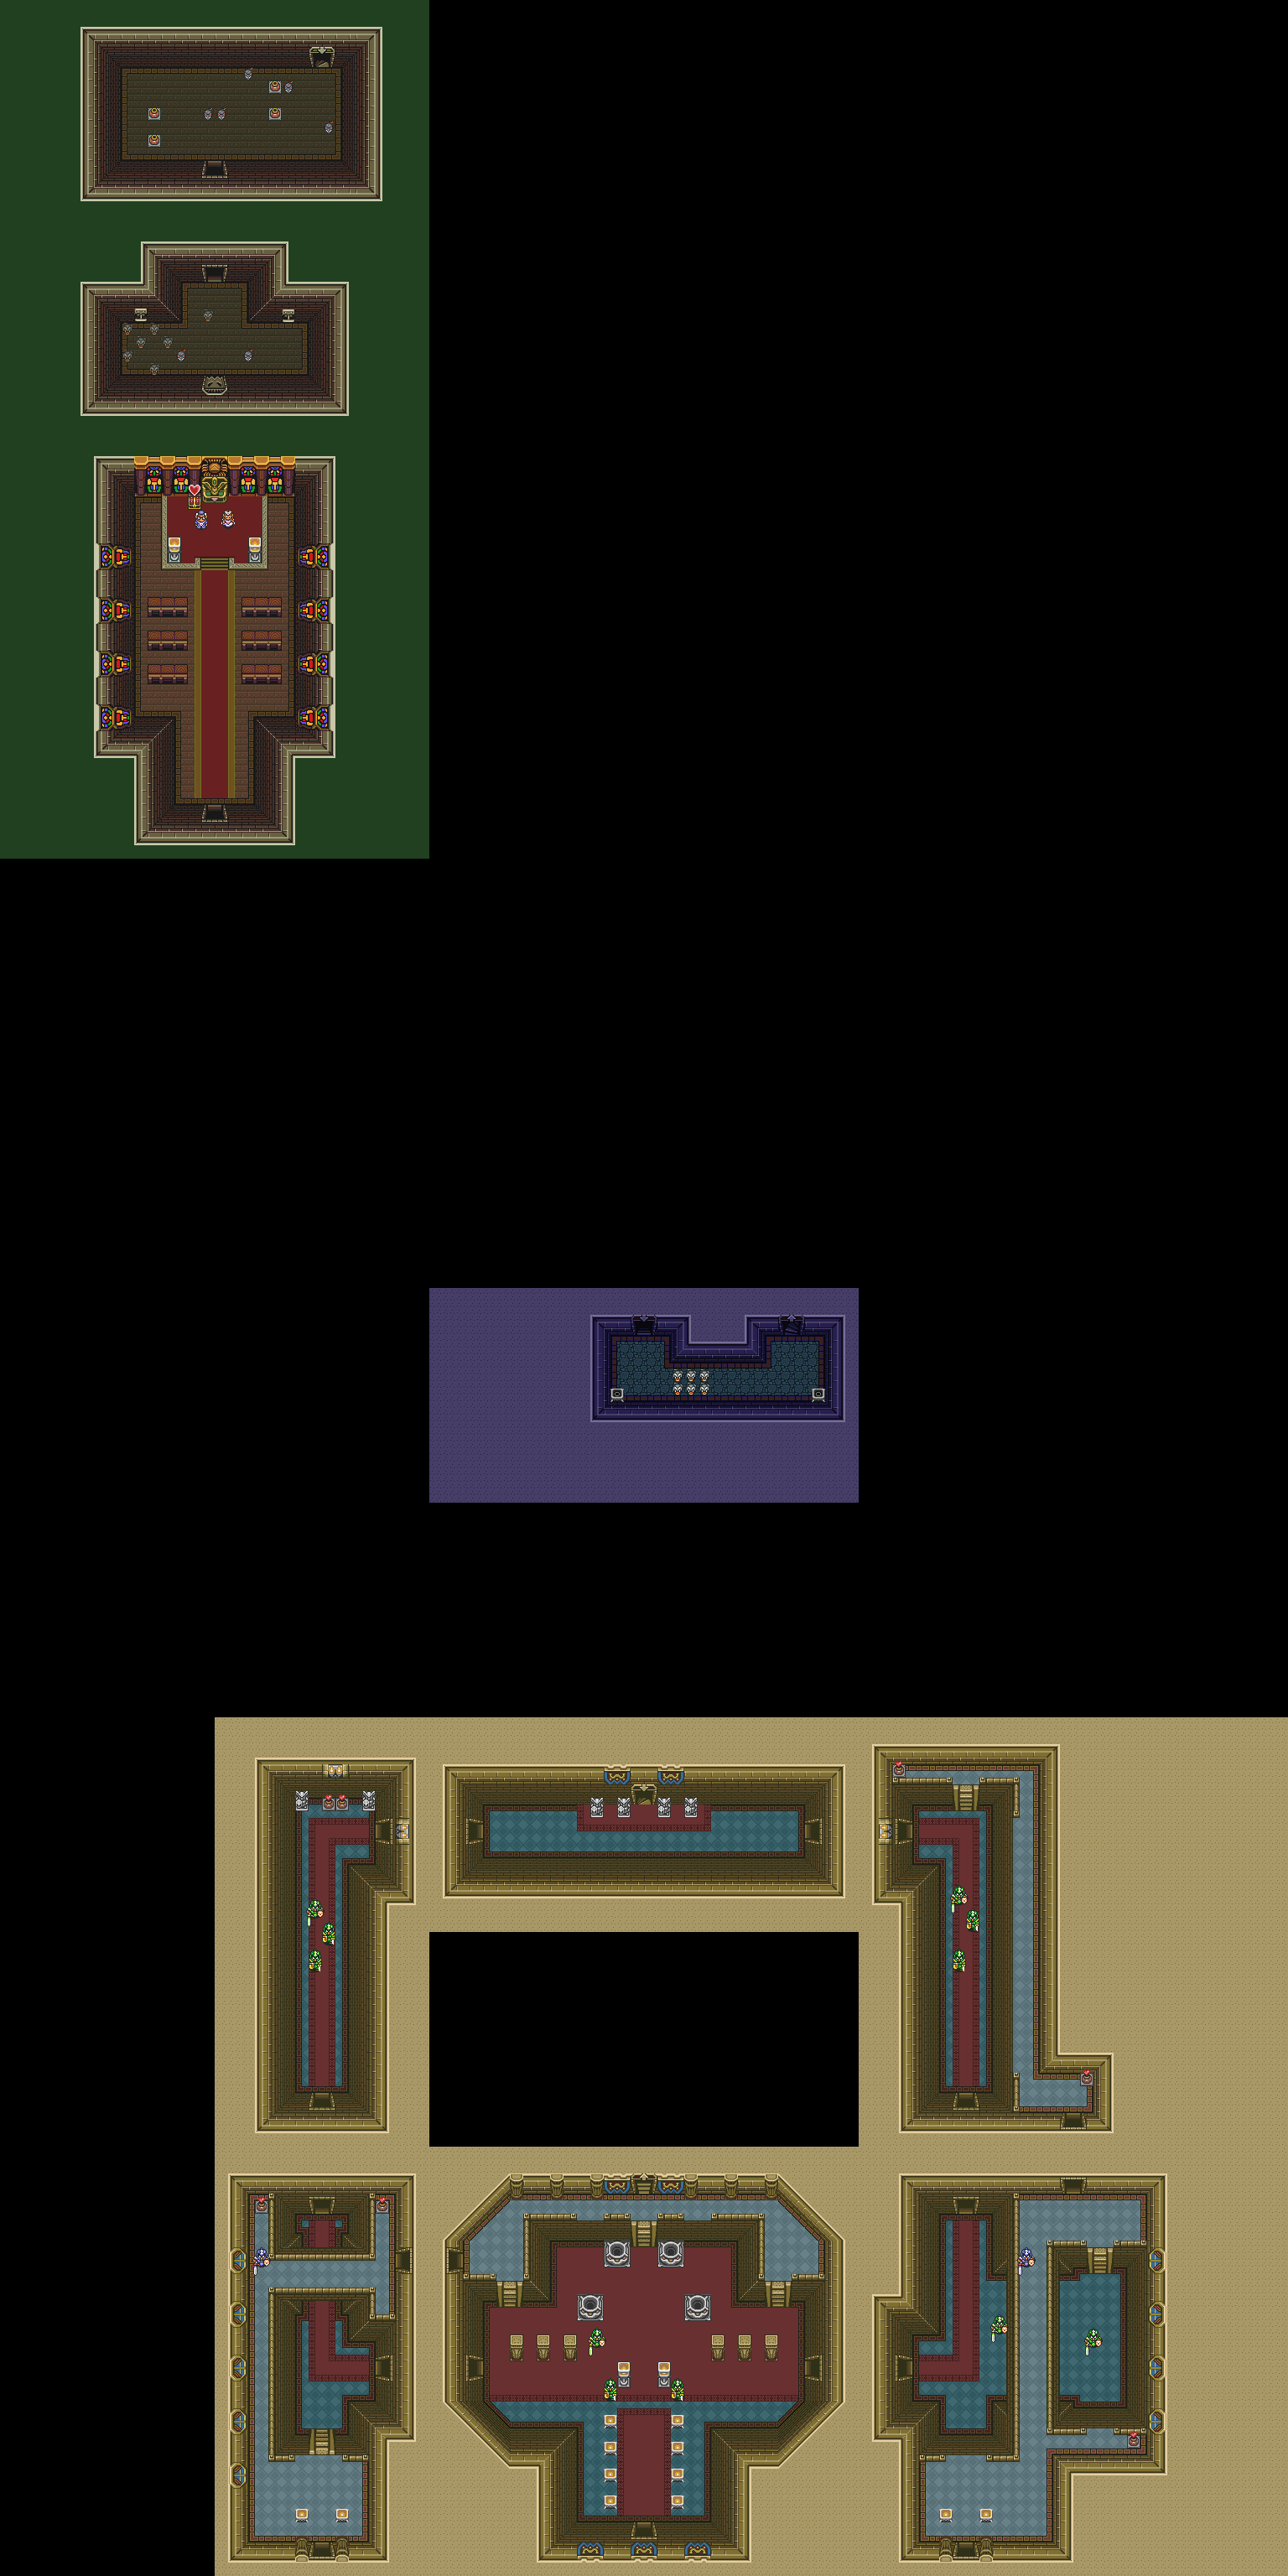
Choose a floor, then enlarge its map. Stairs, treasure chests and passages are annotated on the original game maps.
LIGHT WORLD · Third pendant · don't forget the Pearl.
The Tower of Hera
Before you set outMagic Mirror · Lantern
RewardsMoon Pearl and last pendant
Lower the blue blocks and go down. Take the small key, then adjust the crystal so you can go back up.
Collect the dungeon map. Crystal switches change the colored barriers; star switches change the floor holes.
Open the northwest passage, survive the flying tiles then reach the room with four torches. Light them to reveal the Big Key.
Go back up and take the upper stairs. Push the beetles away from the holes, then collect the compass.
On the upper floor, use the star to open the correct hole. Fall from its northern edge and open the chest for the Moon Pearl.
Take the stairs again. Keep the hearts under the pots to heal before Moldorm, then enter his arena.
After victory, take heart and pendant. Also check that the Pearl is in the inventory before leaving the mountain.
A hint for this chapter +
Stars move holes, and falls can help you.
Reveal the solution
On the floor above the large chest, activate the star near the spinning flames. Approach the hole north of the bumper from its northern edge and drop down.
THE BOSS Moldorm ↗
Only hit the tip of its tail. Keep the center of the platform and avoid exchanges at the edge. A fall resets his life; return via the stairs.
Dungeon floor maps 7 floors
Choose a floor, then enlarge its map. Stairs, treasure chests and passages are annotated on the original game maps.
LIGHT WORLD · The victory which opens a second adventure.
Master Sword and the Sorcerer
Before you set outThree pendants · Moon Pearl
RewardsMaster Sword and lasting access to the world of Darkness
In the Lost Woods, reach the pedestal clearing. With the three pendants, remove Master Sword; the other swords in the wood are decoys.
Follow Zelda's call to the Sanctuary. The rescue now continues at the top of the castle.
On the upper terrace of the castle, hit the magic barrier with Master Sword and enter the tower.
Go up, light the dark rooms and eliminate the guards to get the keys. Pots serve as weapons and contain resources.
After the scene with Zelda, cut the curtain behind Agahnim to access his arena.
Return his appropriate attacks until he is defeated. You are transported to the top of the Pyramid.
If Link remains a rabbit, return to Hera for the Moon Pearl. The Mirror returns to the Light and leaves a temporary return portal.
A hint for this chapter +
The sorcerer himself provides you with your projectile.
Reveal the solution
Return his large energy balls with the sword. Stay away from fragmenting projectiles and lightning.
THE BOSS Agahnim ↗
Stand in front of him to return the big balls. When it moves to the top center to summon lightning, move off its axis. The sword does not directly harm him.
Dungeon floor maps 6 floors
Choose a floor, then enlarge its map. Stairs, treasure chests and passages are annotated on the original game maps.
DARK WORLD · Crystal I · open the roads with a hammer.
The Palace of Darkness
Before you set outMoon Pearl · Bow · Bombs · 110 rupees for Kiki
RewardsHammer and first crystal
From the Pyramid, cross the eastern ruins. Pay the monkey to follow you, then to open the palace; avoid the blows that scare him away.
Take the basement key on the left using the switch. To the right, the teleporter leads to the Goriyas rooms and the map.
Bomb the cracked walls near the map room. To hit a red Goriya, fire an arrow, then move so the enemy mirrors you into its path.
Return to the central route. Drop to the lower level at the marked gaps to reach the Big Key treasure chest. Use the floor maps to follow the connections.
Quickly cross the collapsing bridge. In the maze, take the key to the southeast then bomb the east wall to reach the Hammer.
Flip the turtle enemies with the Hammer before striking them. Collect the compass and lower-floor keys, then return to the switches and green statue.
Hold the button with the statue, shoot the green eye then take the descent. The crystals and teleporters lead to the boss.
Defeat Helmasaur, take heart and crystal. The Hammer now opens many exterior passages.
A hint for this chapter +
A statue hides the last road.
Reveal the solution
After the Hammer, place a statue on the switch then aim at the eye of the green statue with an arrow to open the descent.
THE BOSS Helmasaur King ↗
Destroy his mask with a Hammer or bombs. Once the green gem is discovered, use sword or arrows. Avoid his tail when he swings it.
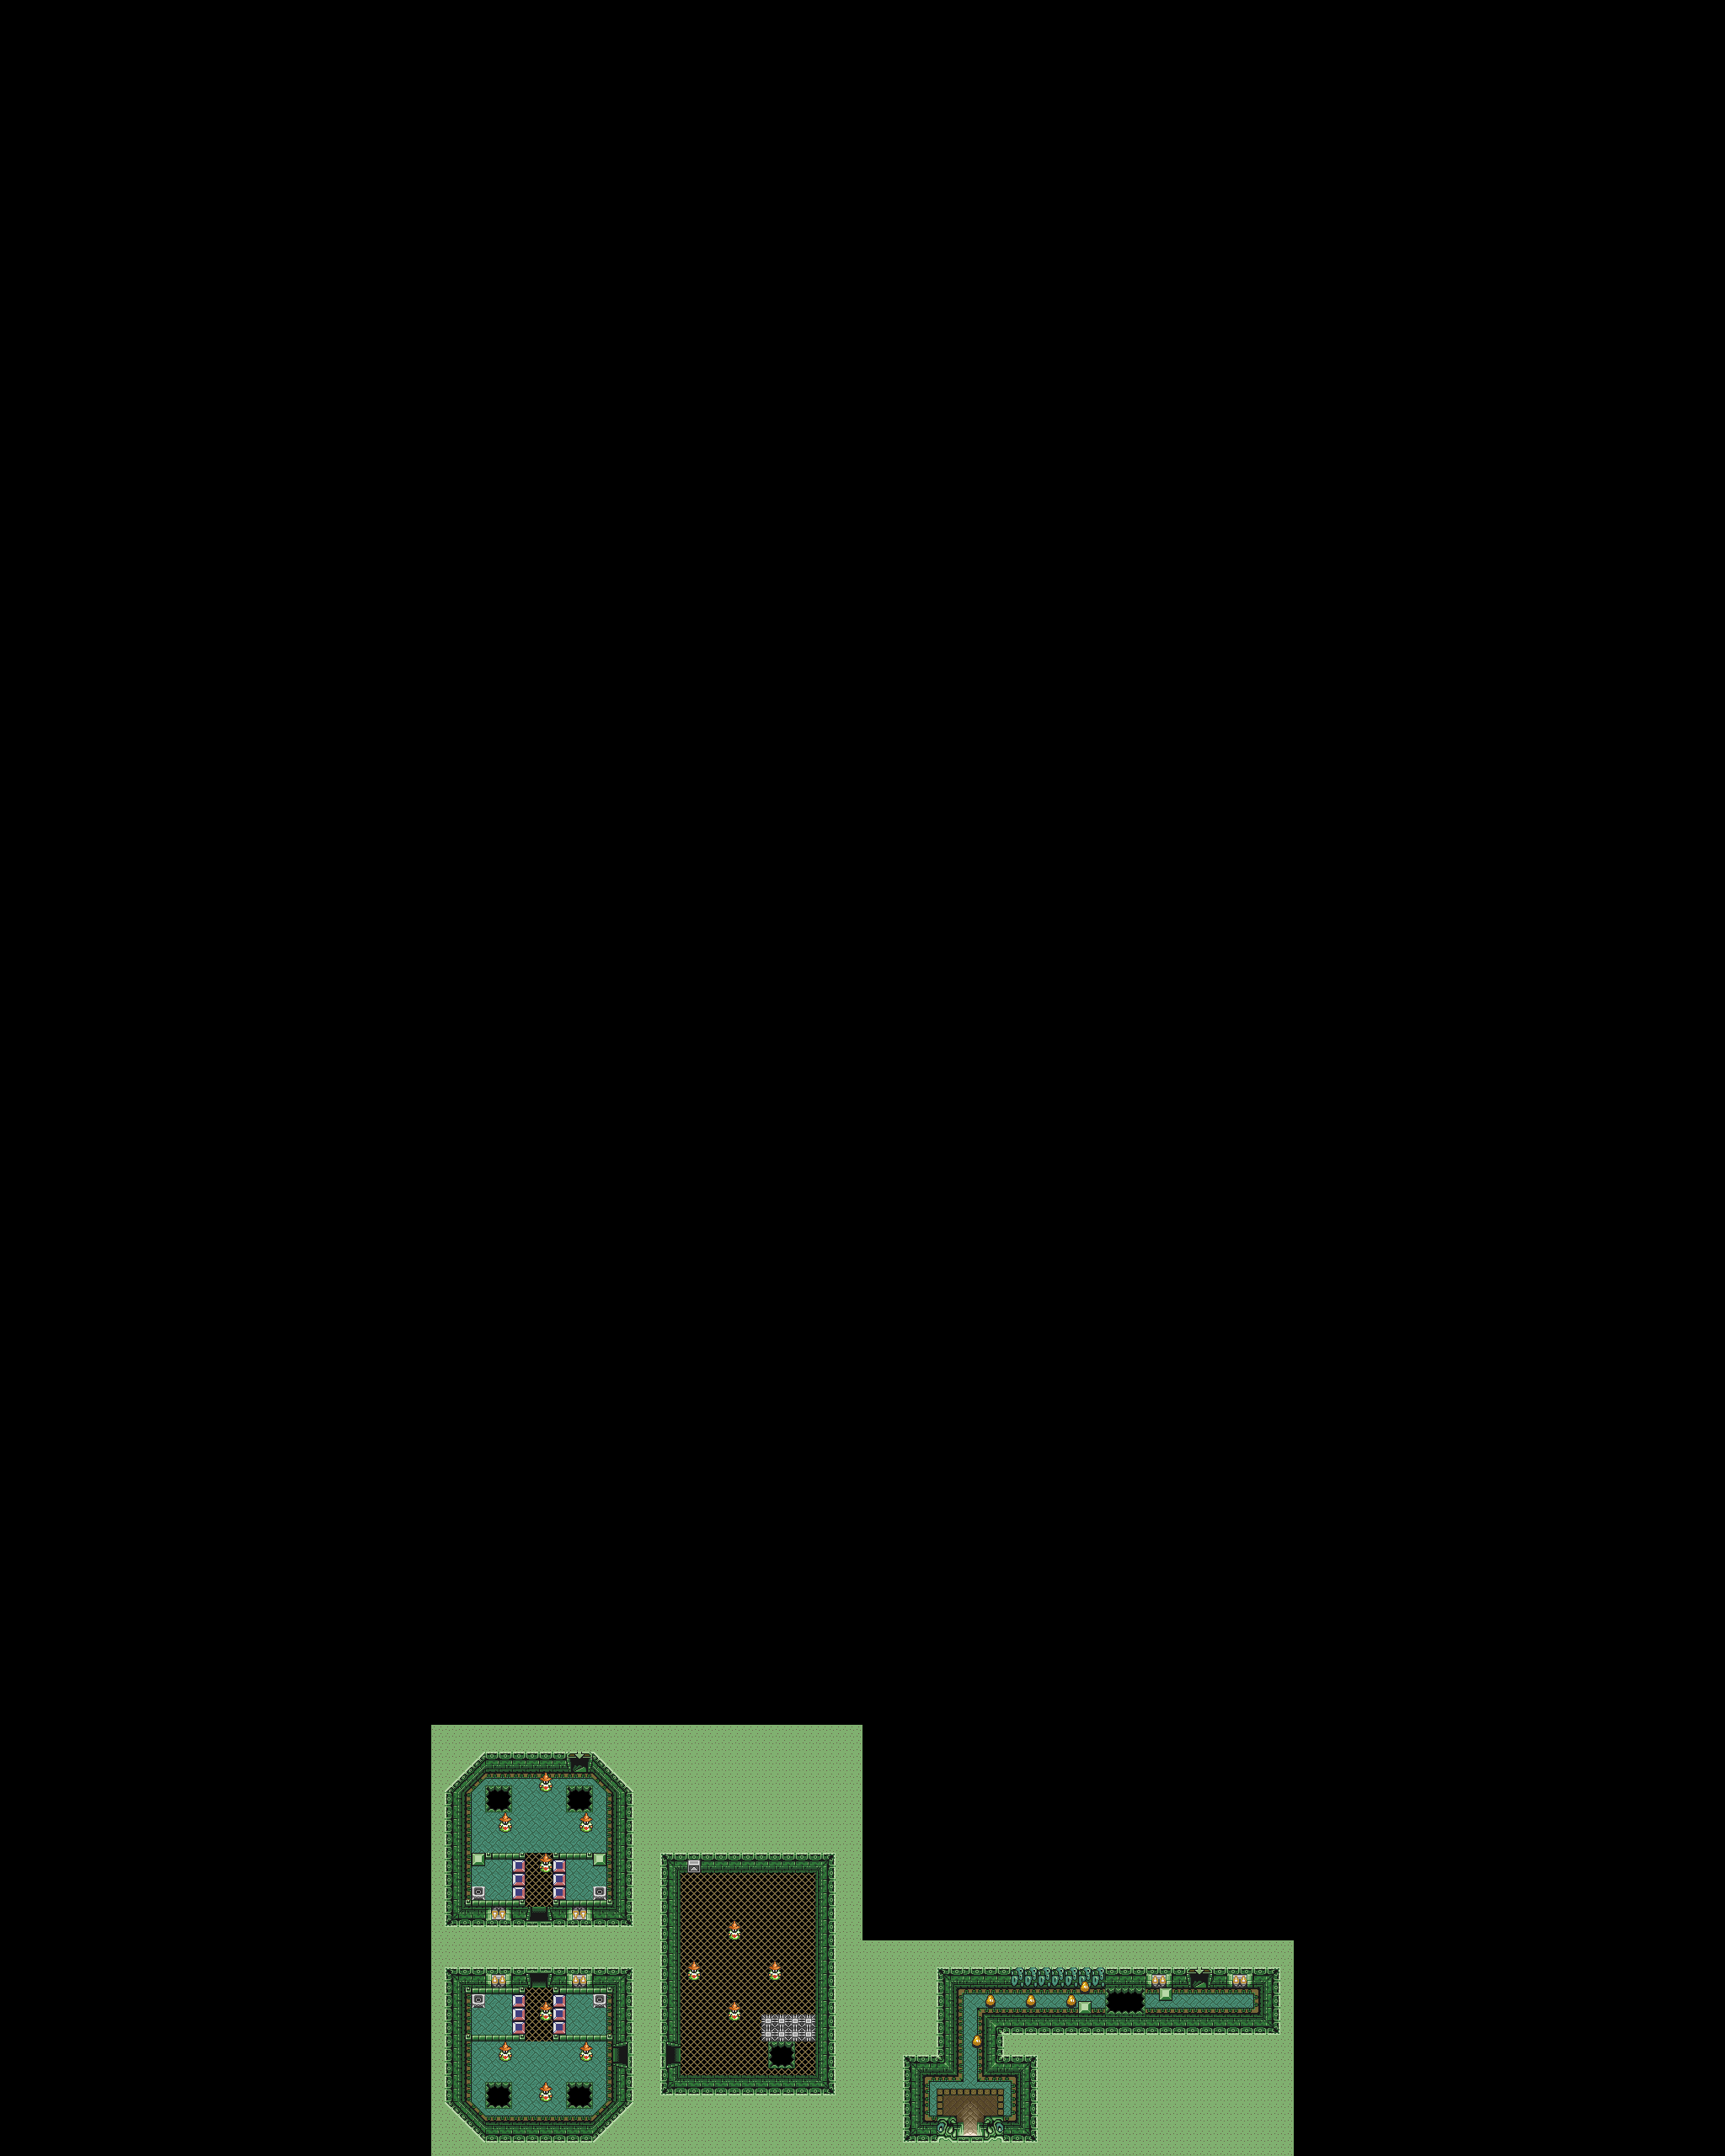
Dungeon floor maps 2 floors
Choose a floor, then enlarge its map. Stairs, treasure chests and passages are annotated on the original game maps.
DARK WORLD · Crystal II · acting in one world changes the other.
The Swamp Palace
Before you set outHammer · Flippers · Magic Mirror
RewardsHookshot and second crystal
In Zora's Domain in the northeast of the Light World, purchase the Flippers for 500 rupees. They make it possible to cross the palace.
Go to the southern ruins in the Dark World. Use the Magic Mirror, enter the corresponding Light World building and pull the right lever.
Exit and return to the Mirror portal. Enter the dark palace, cross the water and eliminate the enemies to reveal the first key.
Go down, look for the keys under the skulls and activate the valves. The Hammer allows you to lower obstacles.
From the central pool, open to the northwest and push the valve to the left. Set the crystal to lower the orange blocks, then swim into the southwest channel. To the west, push the bottom block to the left then the central block up. Go up; fall into the northeast hole and open the chest to the east.
Take the Hookshot. Use the pots as attachment points to cross the gaps and reach the distant platforms.
Use the Hookshot on the pot east of the big treasure chest to reach a key, then hook onto the pots to the north. Beyond the locked door, hold the switch down with the statue. Use the left doorway on the east side. Descend to the lever and drain the water. Return to the waterfalls and walk through the second one from the right. Collect the last key beneath a skull before the final door.
Enter the boss room with the Hookshot ready. Take the receptacle and the crystal after the fight.
A hint for this chapter +
The dry entrance is not a definitive dead end.
Reveal the solution
Use the Magic Mirror outside Swamp Palace. Enter the corresponding Light World building, pull the right lever, then return through the portal you left outside.
THE BOSS Arrghus ↗
Isolate each small cloud with the Hookshot and destroy it with the sword. Once the body is discovered, avoid its fall then strike between its movements.
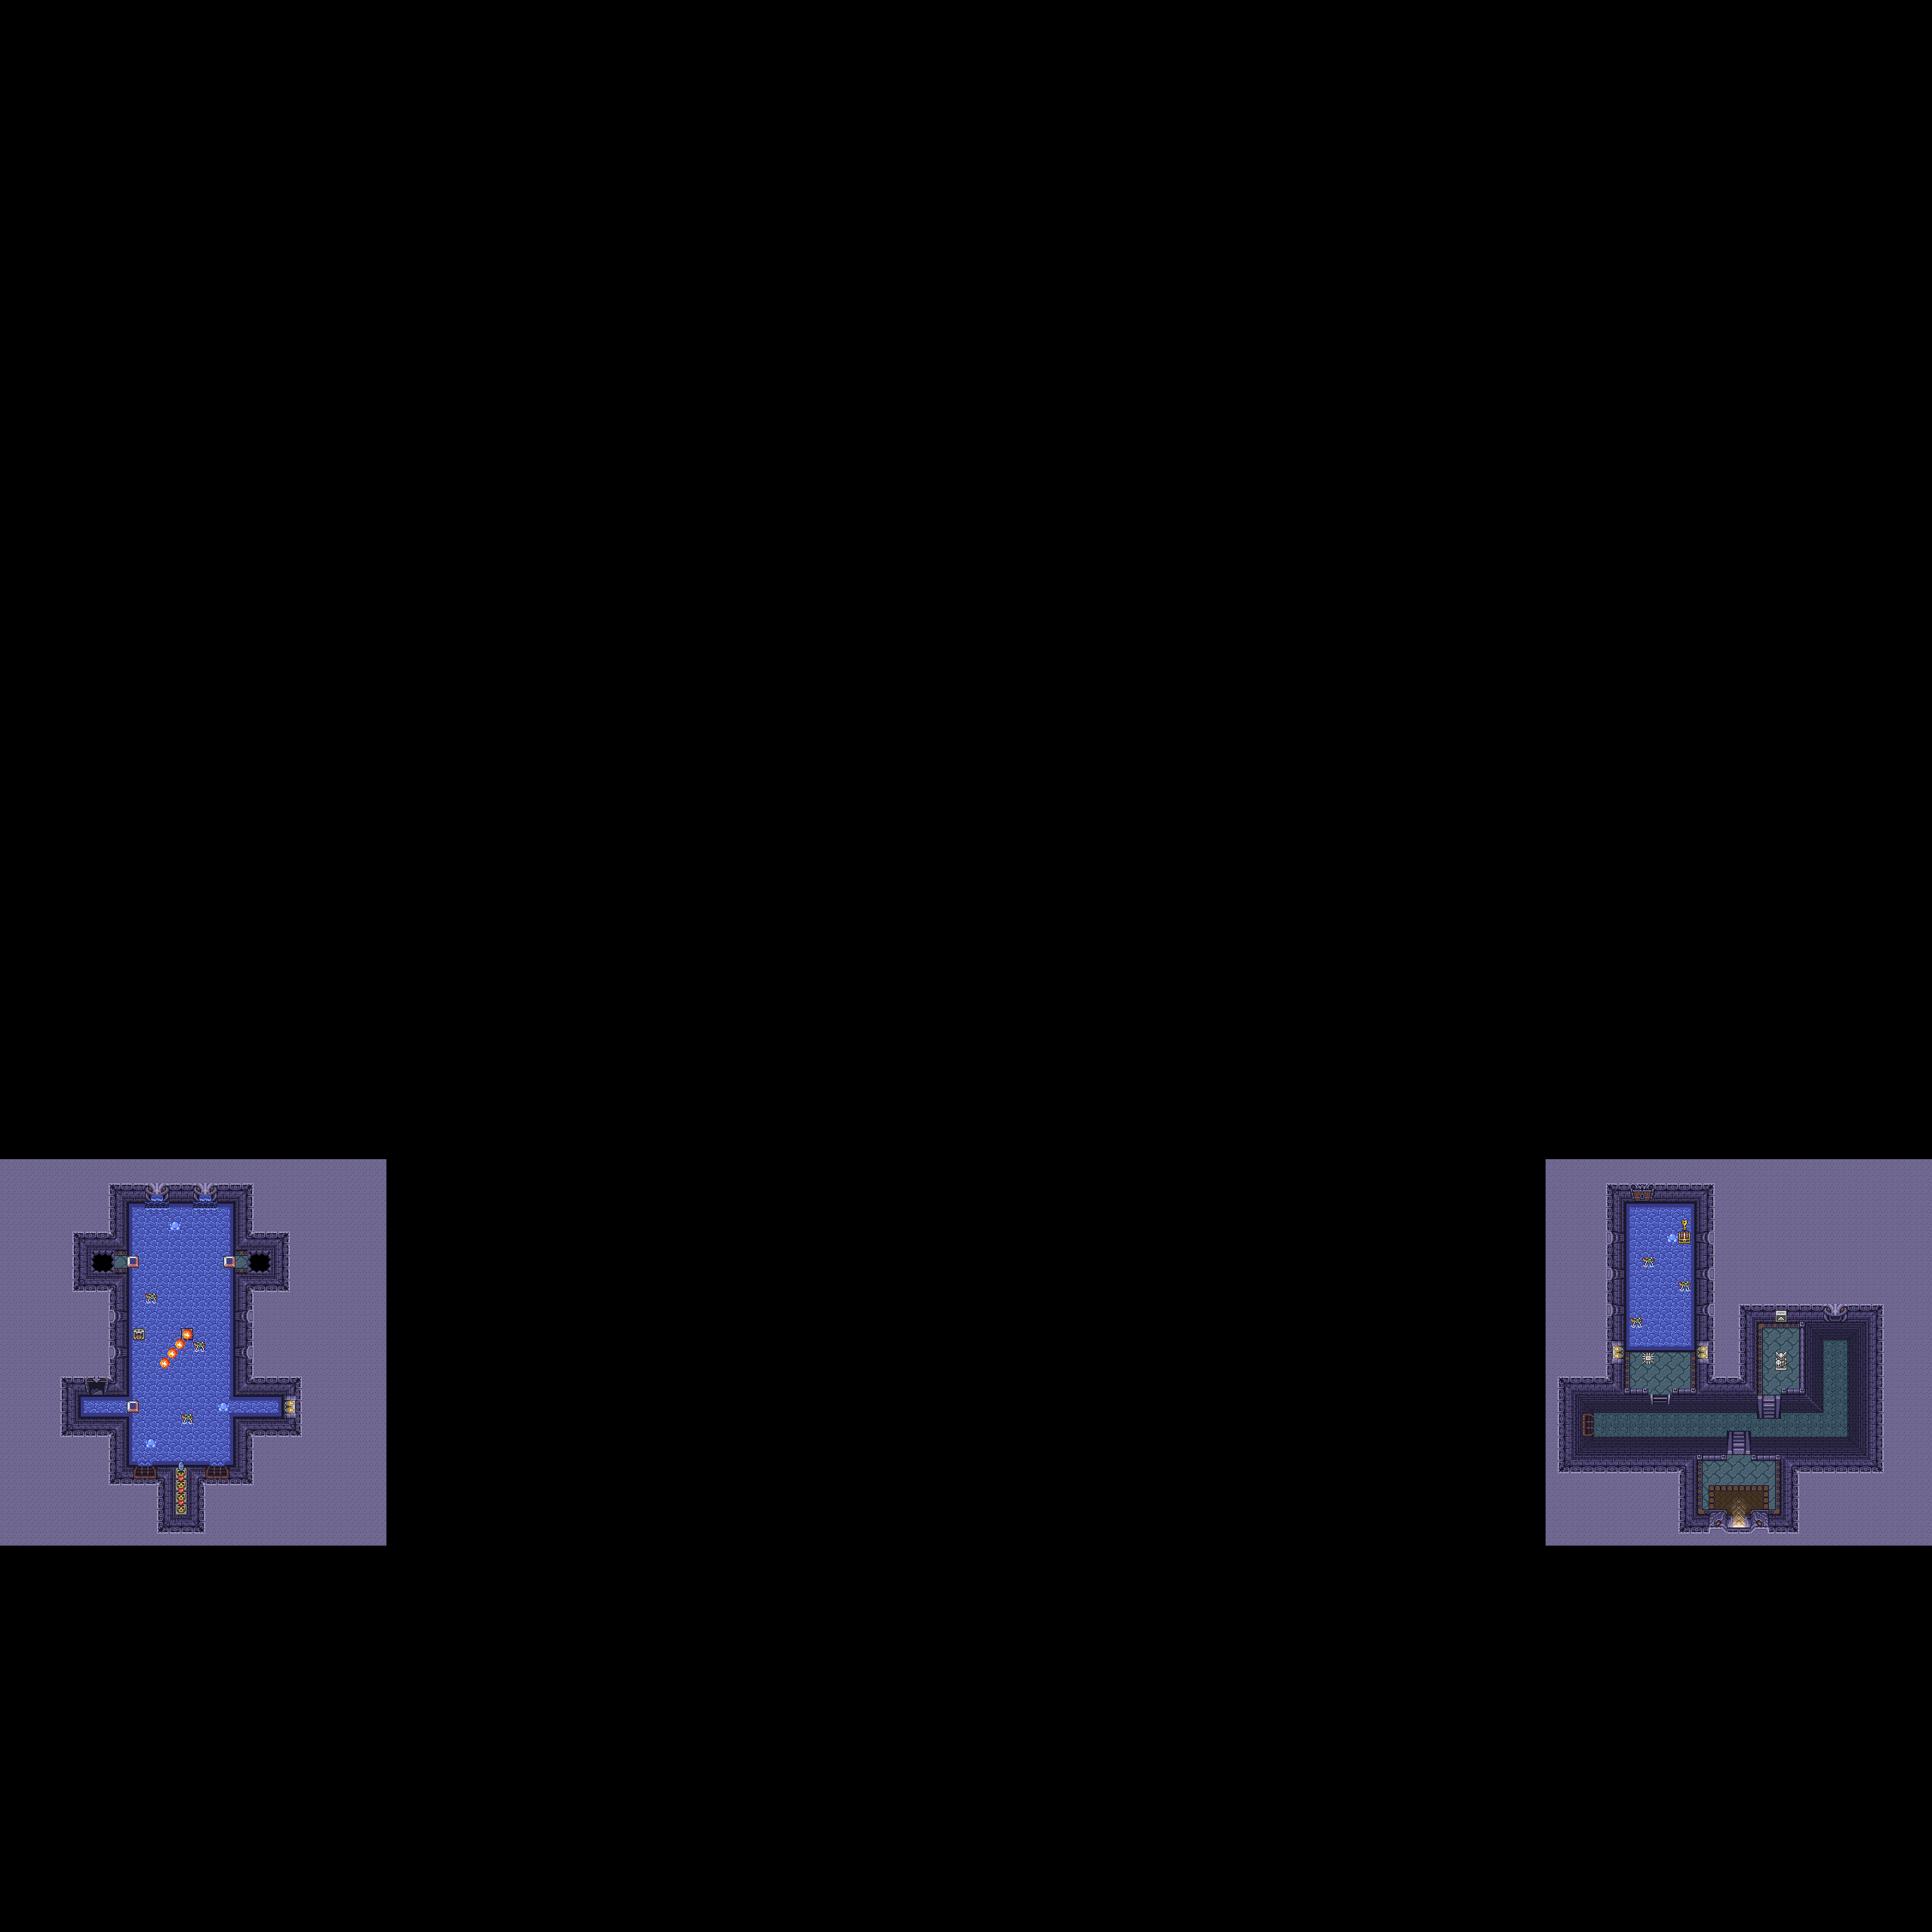
Dungeon floor maps 3 floors
Choose a floor, then enlarge its map. Stairs, treasure chests and passages are annotated on the original game maps.
DARK WORLD · Crystal III · a dungeon scattered in the woods.
The Skull Woods
Before you set outMoon Pearl · Hammer · Hookshot · Bombs · Magic available
RewardsFire Rod and third crystal
From the bridge east of the bomb shop, go back up to the broken bridge. Above, a grass arrow indicates where to use the Hookshot towards the west bank. Continue north then west, past the cemetery and the Dark Sanctuary, then reach the village and the forest to the north.
Drop into the openings to collect keys, map and compass. Move as soon as a shadow of a hand appears above Link.
In the middle area, move the statue onto the switch to keep the door open. Take the Big Key behind this passage.
Enter the big treasure chest section from the forest. Bomb the cracked wall, then pull the lever to remove the obstacle and open the treasure chest.
Go out and reach the northwest end of the woods. Burn the large skull obstruction with the Fire Rod.
Use the star switches to change the floor holes and cross the room. Light the torches, cut the curtain of vines, then defeat the Gibdo carrying a key.
Avoid the hands and jump into the arena. After victory, collect heart and crystal.
A hint for this chapter +
The holes in the forest are dungeon entrances.
Reveal the solution
Alternate exits and holes to go around interior walls. After the Big Key, blow up the crack leading to the lever that opens access to the large chest.
THE BOSS Mothula ↗
The Fire Rod and sword both damage Mothula. Watch the moving floor and spikes, and keep room to retreat instead of chasing every opportunity to attack.
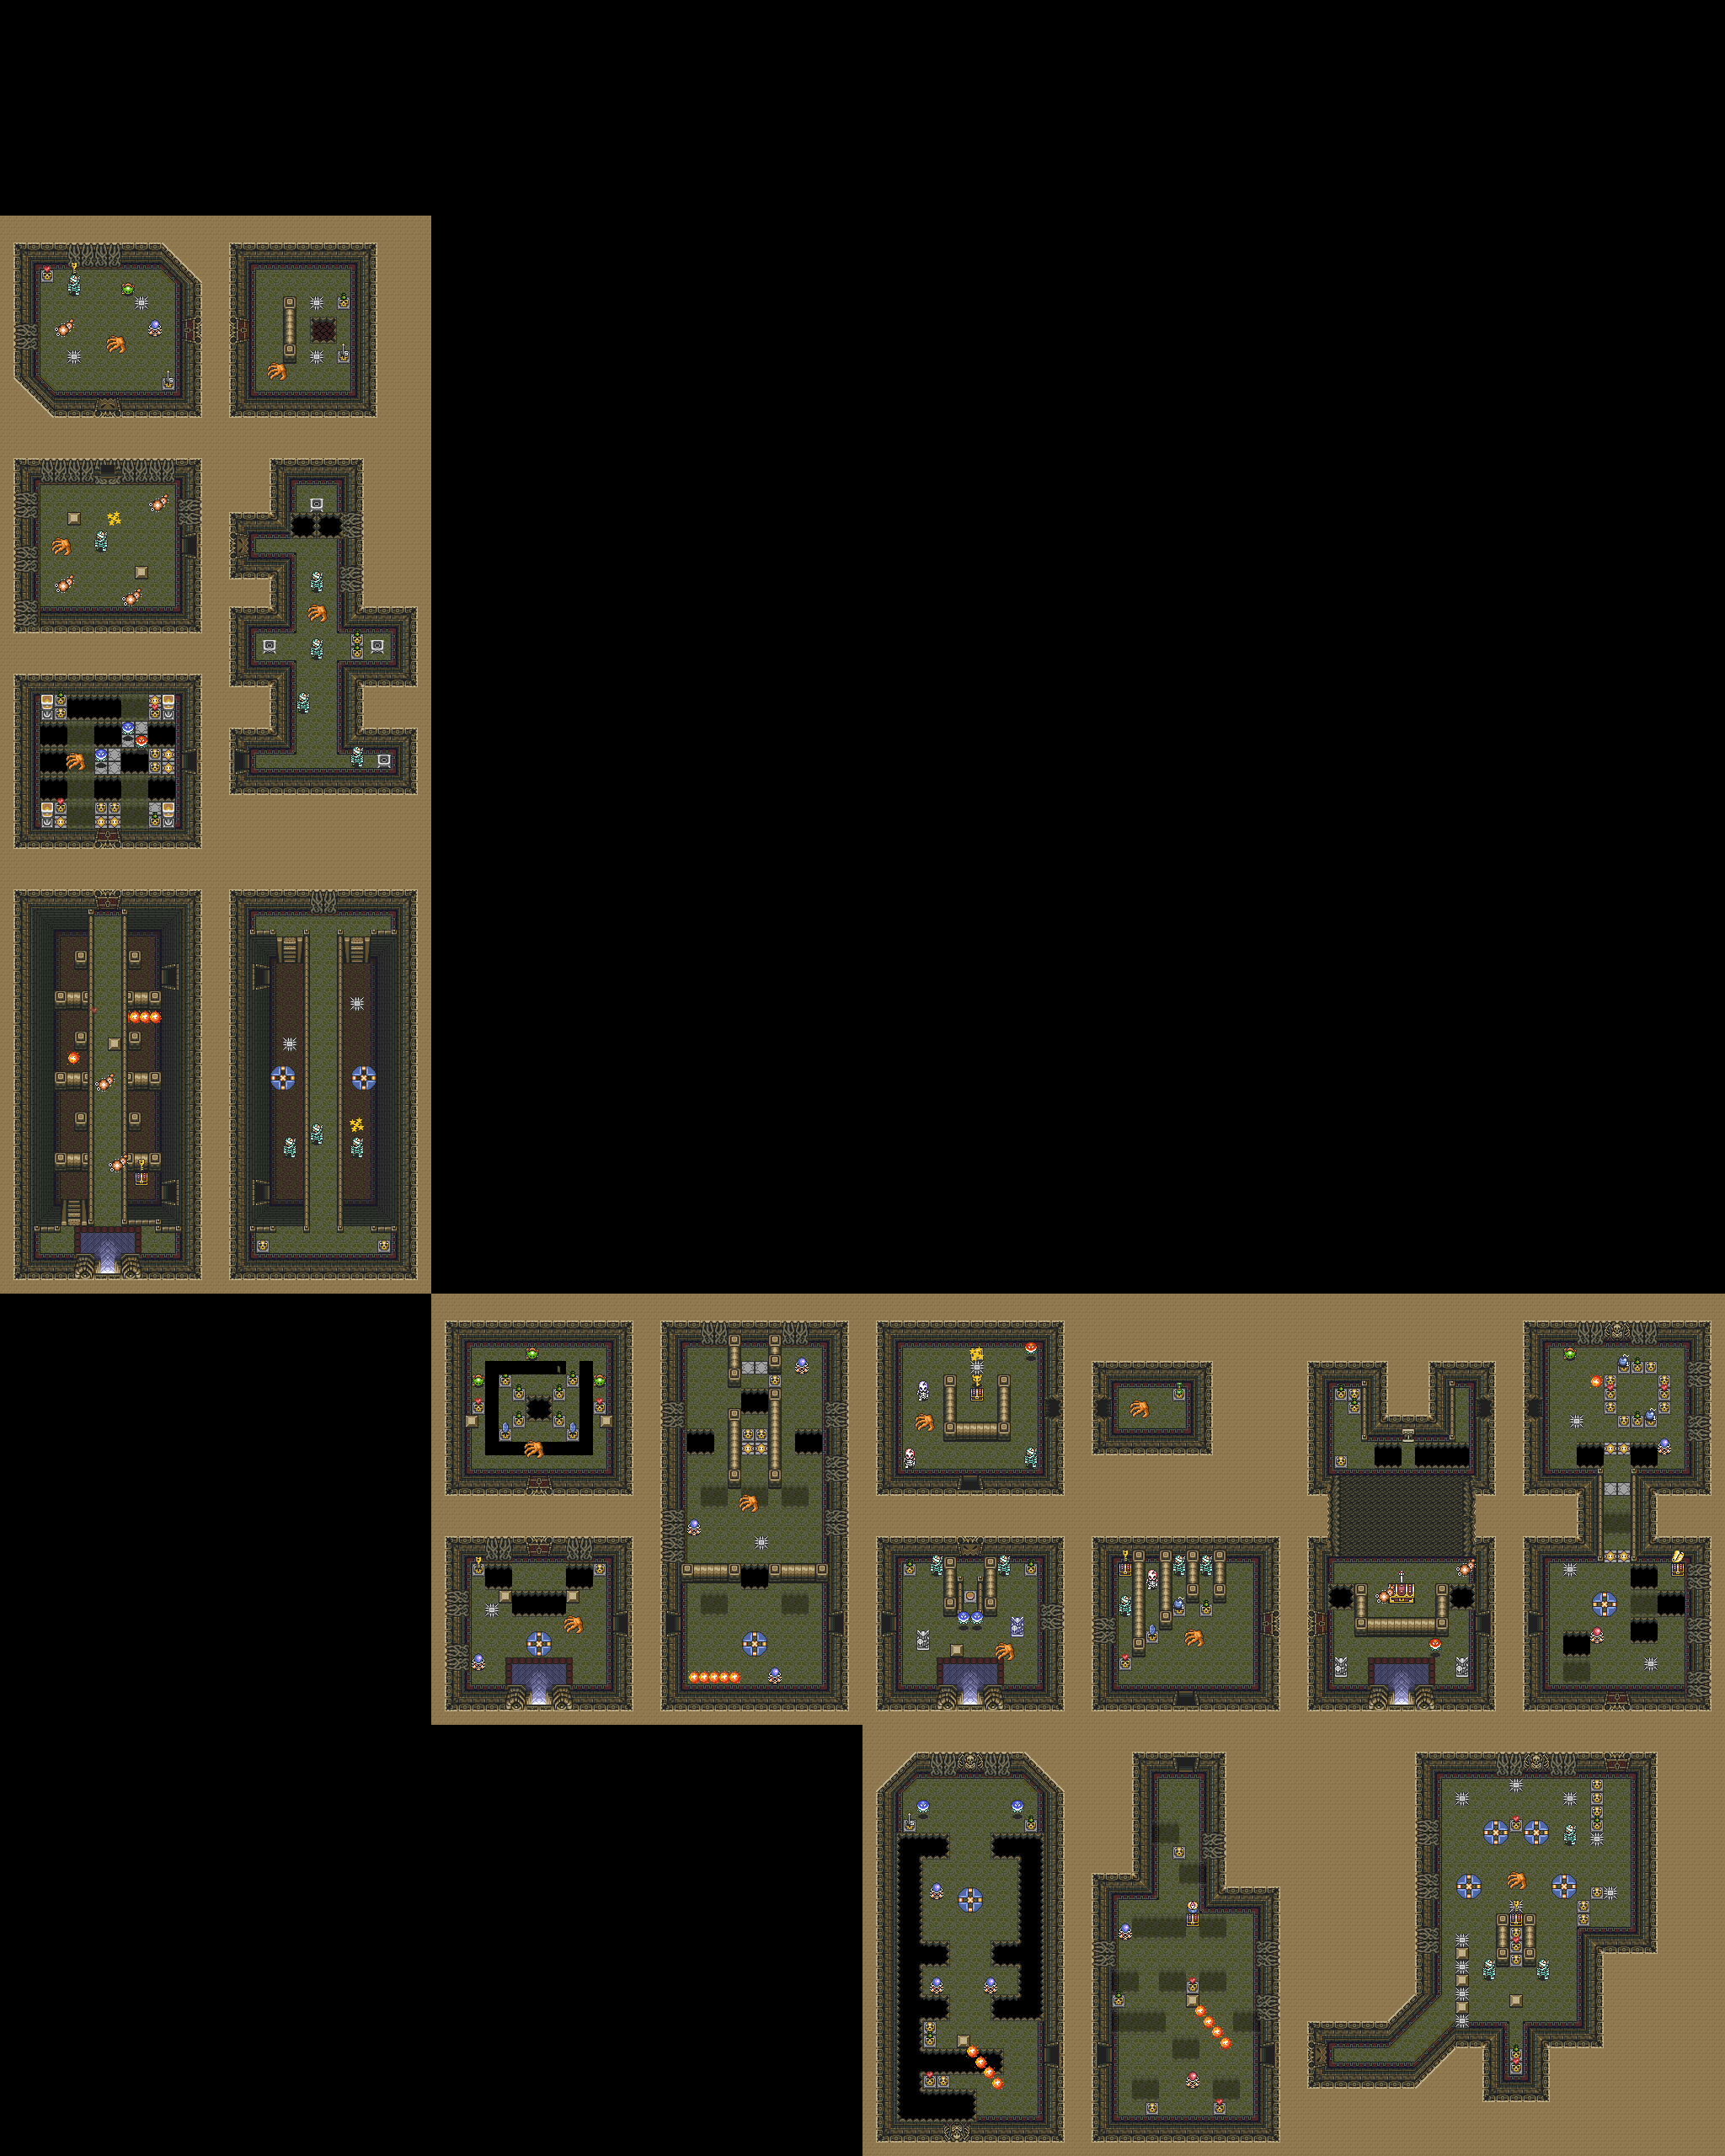
Dungeon floor maps 2 floors
Choose a floor, then enlarge its map. Stairs, treasure chests and passages are annotated on the original game maps.
LIGHT WORLD · A better equipped hero for the second half.
The Essential Detours
Before you set outTitan's Mitt · Mirror · Hammer
RewardsTempered Sword, Flute, enhanced magic and optional tools
South of the Village of Outcasts, lift the dark rocks and speak to the frog. Use the Magic Mirror and escort the transformed blacksmith to the Light World workshop.
Pay the blacksmiths, leave the area then return for the upgraded sword. You do not have to wait on site.
Speak to the musician in the Dark World grove to receive the Shovel. Dig among the flowers in the northwest of the Light World grove to find the Flute. Play it before Kakariko’s bird statue.
Collect the mushroom from the Lost Woods, give it to the witch then return to get the powder from her shop.
Hammer the obstacle near the blacksmiths and drop into the well. Sprinkle Magic Powder on the altar to unlock half magic consumption.
On the northeast shore of Lake Hylia in the Light World, open the hidden cave with a bomb and take the Ice Rod.
Obtain Ether near Hera with the Book and Master Sword; Quake with the fish of the northeast dark lake; Bombos on the desert ledge via the Mirror.
Find the Magic Cape beneath a Light World grave. The Cane of Byrna is in the spike-filled cave on Dark World Death Mountain. Bring healing supplies and enough magic.
A hint for this chapter +
A green figure waits near the dark village.
Reveal the solution
Free the blacksmith transformed into a frog. Use the Magic Mirror to escort him to his Light World workshop, then have your sword tempered.
DARK WORLD · Crystal V · think from one floor to another.
The Ice Palace
Before you set outTitan's Mitt · Flippers · Fire Rod · Hammer · Hookshot
RewardsBlue Mail and fifth crystal
On the central island of Lake Hylia in the Light World, lift the black rock. The teleporter drops you off in front of the dark entrance.
Use the Fire Rod on the frozen guardian at the entrance. Take the key obtained by eliminating the following enemies.
Set the crystal, plant a bomb near it then pass the barrier before the explosion. Bomb the cracked ground and fall.
Hit each Stalfos to collapse it, then bombard its bones. Go down the corridors, collecting the keys.
Follow the Hookshot route and stairs. At the mole-shaped obstacles, use the Hammer and glove, pull the statue’s tongue, then climb to the Big Key.
Return to the room with a bombable floor beside the stairs. Bomb the floor and drop through to reach the big treasure chest containing the Blue Mail.
Open the crystal passages then go around to the east and south to return to the left of the hole. Push the bottom block into it.
Jump after the block, place it on the button and go through the door. Move the statue on the left, hammer the obstacles and lift the block that hides the final hole.
Save magic for his shell. After the fight, take heart and fifth crystal.
A hint for this chapter +
The useful block must fall on the correct side of the hole.
Reveal the solution
On SNES, follow the dungeon’s looping route to reach the left side of the hole on the upper floor. Push the lower block into the hole, jump after it and place it on the floor switch. The Cane of Somaria offers a shortcut if you cleared Misery Mire first.
THE BOSS Kholdstare ↗
Melt the ice prison with the Fire Rod or Bombos. Then fight the three eyes while avoiding their contact and the shards that fall from the ceiling.
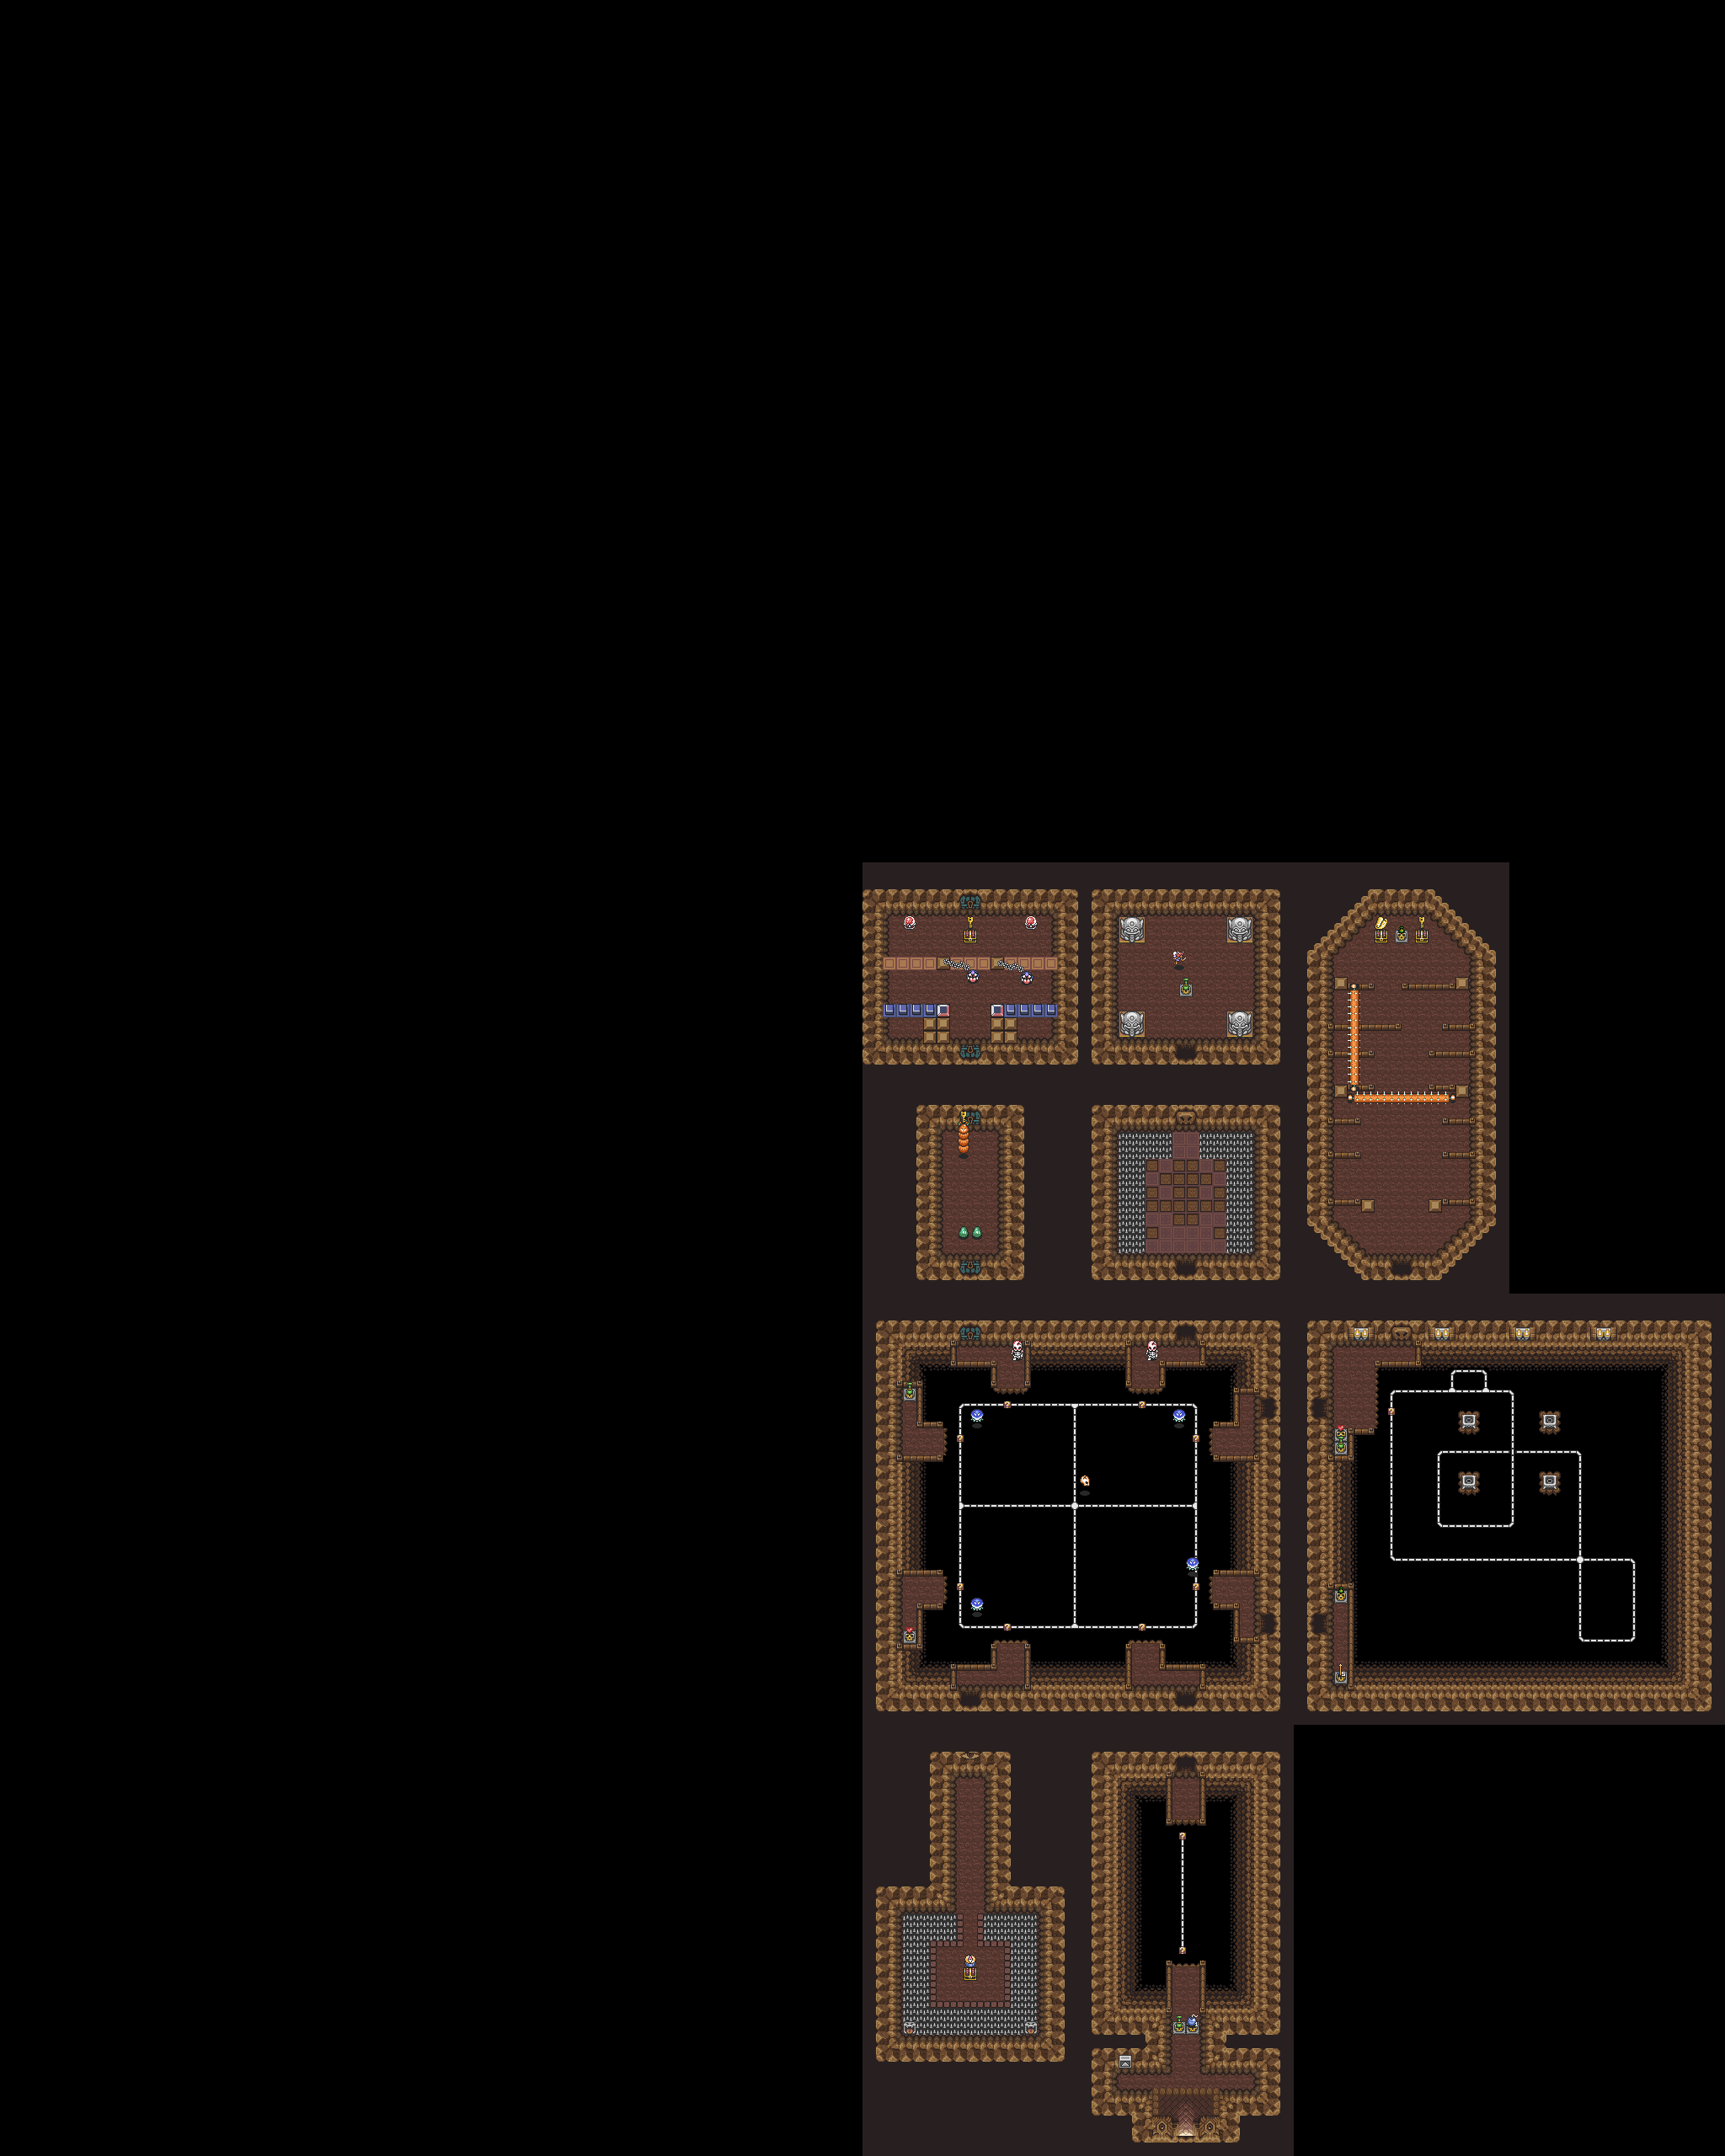
Dungeon floor maps 8 floors
Choose a floor, then enlarge its map. Stairs, treasure chests and passages are annotated on the original game maps.
Before you set outActivated Flute · Titan's Mitt · Ether · Pegasus Boots · Fire Rod
RewardsCane of Somaria and sixth crystal
In the Light World, use the Flute to fly to location 6. Lift the dark rock on the plateau to uncover the warp tile.
Stand on the Ether symbol outside Misery Mire in the Dark World. Use the Ether Medallion with your sword equipped to open the entrance.
Use the boots or the Hookshot to get through the opening. Eliminate the enemies needed to open the first doors.
Collect the keys under the skulls and in the chests. Locate the floors connected by grids and the crystals that control the barriers.
In the two neighboring blocky rooms, clear the torches and light all four quickly. Return to the transformed floor and fall down to the Big Key.
Reach the big treasure chest in the eastern rooms: Hookshot across to the block, then dash along the collapsing walkway with the Pegasus Boots. Take the Cane of Somaria.
Place a Somaria block on the button that does not stay pressed. In the dark rooms, bomb the north wall and activate the crystals from a distance.
Gain the big door then beat Vitreous. Take the rewards before leaving.
A hint for this chapter +
The sound of a room changing is a clue of return.
Reveal the solution
Quickly light the four torches spread across the two neighboring rooms. Return to the displaced room and fall through the hole to reach the Big Key.
THE BOSS Vitreous ↗
Stay in a lower corner when lightning strikes in the center. Repel the little eyes with the sword; when the big eye pounces, use the bow or sword.
Dungeon floor maps 3 floors
Choose a floor, then enlarge its map. Stairs, treasure chests and passages are annotated on the original game maps.
Before you set outCrystals from Ice Palace and Misery Mire · Tempered Sword
RewardsGolden Sword and Silver Arrows
After collecting crystals 5 and 6, visit the Bomb Shop at the Dark World counterpart of Link’s house.
Buy the Super Bomb. It follows you: do not trigger it before reaching the cracked wall.
Walk along the paths with the Super Bomb following you. Do not dash, jump off ledges or use travel methods that leave it behind. Bring it to the large crack in the Pyramid wall.
Let the bomb explode against the cracked wall, then enter the Great Fairy Fountain.
Throw your bow and Tempered Sword into the pool, one item at a time. Collect Silver Arrows and Golden Sword.
Refill the bottles and restore the magic. Keep the Ice Rod in your preparation for the next dungeon.
A hint for this chapter +
Transporting the bomb is as important as purchasing it.
Reveal the solution
Buy the Super Bomb in Link's dark house, then walk to the Pyramid Crack without running or jumping off a ledge.
DARK WORLD · Crystal VII · fire, ice and hanging rails.
Turtle Rock
Before you set outTitan's Mitt · Hammer · Quake · Somaria · Fire Rod and Ice Rod
RewardsMirror Shield and last crystal
On the eastern summit in the Light World, lift the dark rock. Hammer the three pegs in this order: right, top, left. Step onto the warp tile.
On the Dark Summit emblem, launch Quake. Drop down past the turtle head and enter.
Use Somaria on the question mark in the first gap. At intersections, choose your direction to reach each branch.
In the room of four torches, prepare the Fire Rod before the circuit. Return to the door while all the flames are lit.
Defeat the cacti for their keys. In the Chomp room, activate the crystal and push the upper block of the group on the left to reveal a chest. At the lava room, take the eastern pipe. Eliminate the cactus in the crystal room, open the east door by going backwards to avoid the laser, then enter the pipe: it leads to the Big Key.
Continue to the two exits on the mountainside. The Mirror here allows a Light World detour for a Piece of Heart.
Enter via the other access to the ledge, cross the gap with the Hookshot and open the large chest. Now orient the shield towards the lasers.
On the rails, first reach the central island and its button under a skull. Take a platform again to reach the southwest exit.
Cross the laser hallway with the Mirror Shield facing each eye. Collect the key in the last treasure chest, then pass the crystal-switch barriers to reach the boss.
Defeat Trinexx, take heart and crystal. The seven girls can now open Ganon's Tower.
A hint for this chapter +
Red magic transforms certain points into platforms.
Reveal the solution
Use Somaria on question marks. Save enough magic to light the torches from the rails and for the boss's two elemental heads.
THE BOSS Trinexx ↗
Ice against the red head, fire against the blue, then sword during the stun. Destroy the blue head early to limit frozen ground. In its second form, hit the central glowing segment.
Dungeon floor maps 4 floors
Choose a floor, then enlarge its map. Stairs, treasure chests and passages are annotated on the original game maps.
DARK WORLD · The tests are answered one last time.
Ganon’s Tower
Before you set outSeven crystals · Hookshot · Somaria · Fire · Bombs · Bow
RewardsRed Mail and access to Ganon
At the top of the Dark Mountain, stand in front of the tower with the seven crystals.
Take the keys, use Hammer and Hookshot to connect the platforms. Set the crystals with delayed bombs.
Use a Somaria block to hold down the floor switch. Survive the flying tiles until the room unlocks. Continue through the torch and conveyor-belt puzzles.
Use Somaria to explore invisible paths; Ether can reveal them briefly. Move forward in small segments.
Reach the Armos Knights’ icy arena. Defeat them, then open the treasure chests in the next room to obtain the Big Key.
Return to the large chest before going up. The tunic reduces damage from the last run.
Go through the large doors and eliminate the waves of enemies; manage lasers and moving floors.
Quickly light the four torches when the floor collapses. In the next room, collect the key from the enemies.
Throw a bomb down the conveyor belt towards the cracked wall; continue through the colored barriers.
Strike Moldorm’s tail without falling. Use the Hookshot on the newly revealed treasure chest, then climb the final stairs.
Defeat Agahnim II. The scene takes you towards the Pyramid, but you can still resupply before Ganon.
A hint for this chapter +
Look for the treasure and the Big Key before going up.
Reveal the solution
The lower dungeon routes lead to the Armos Knights on ice and the Big Key. Return to the central big treasure chest before beginning the climb.
THE BOSS Agahnim II ↗
Spot the real wizard among his doubles. Send the big balls back in his direction; dodge the small projectiles that fragment. Copy attacks can also be returned.
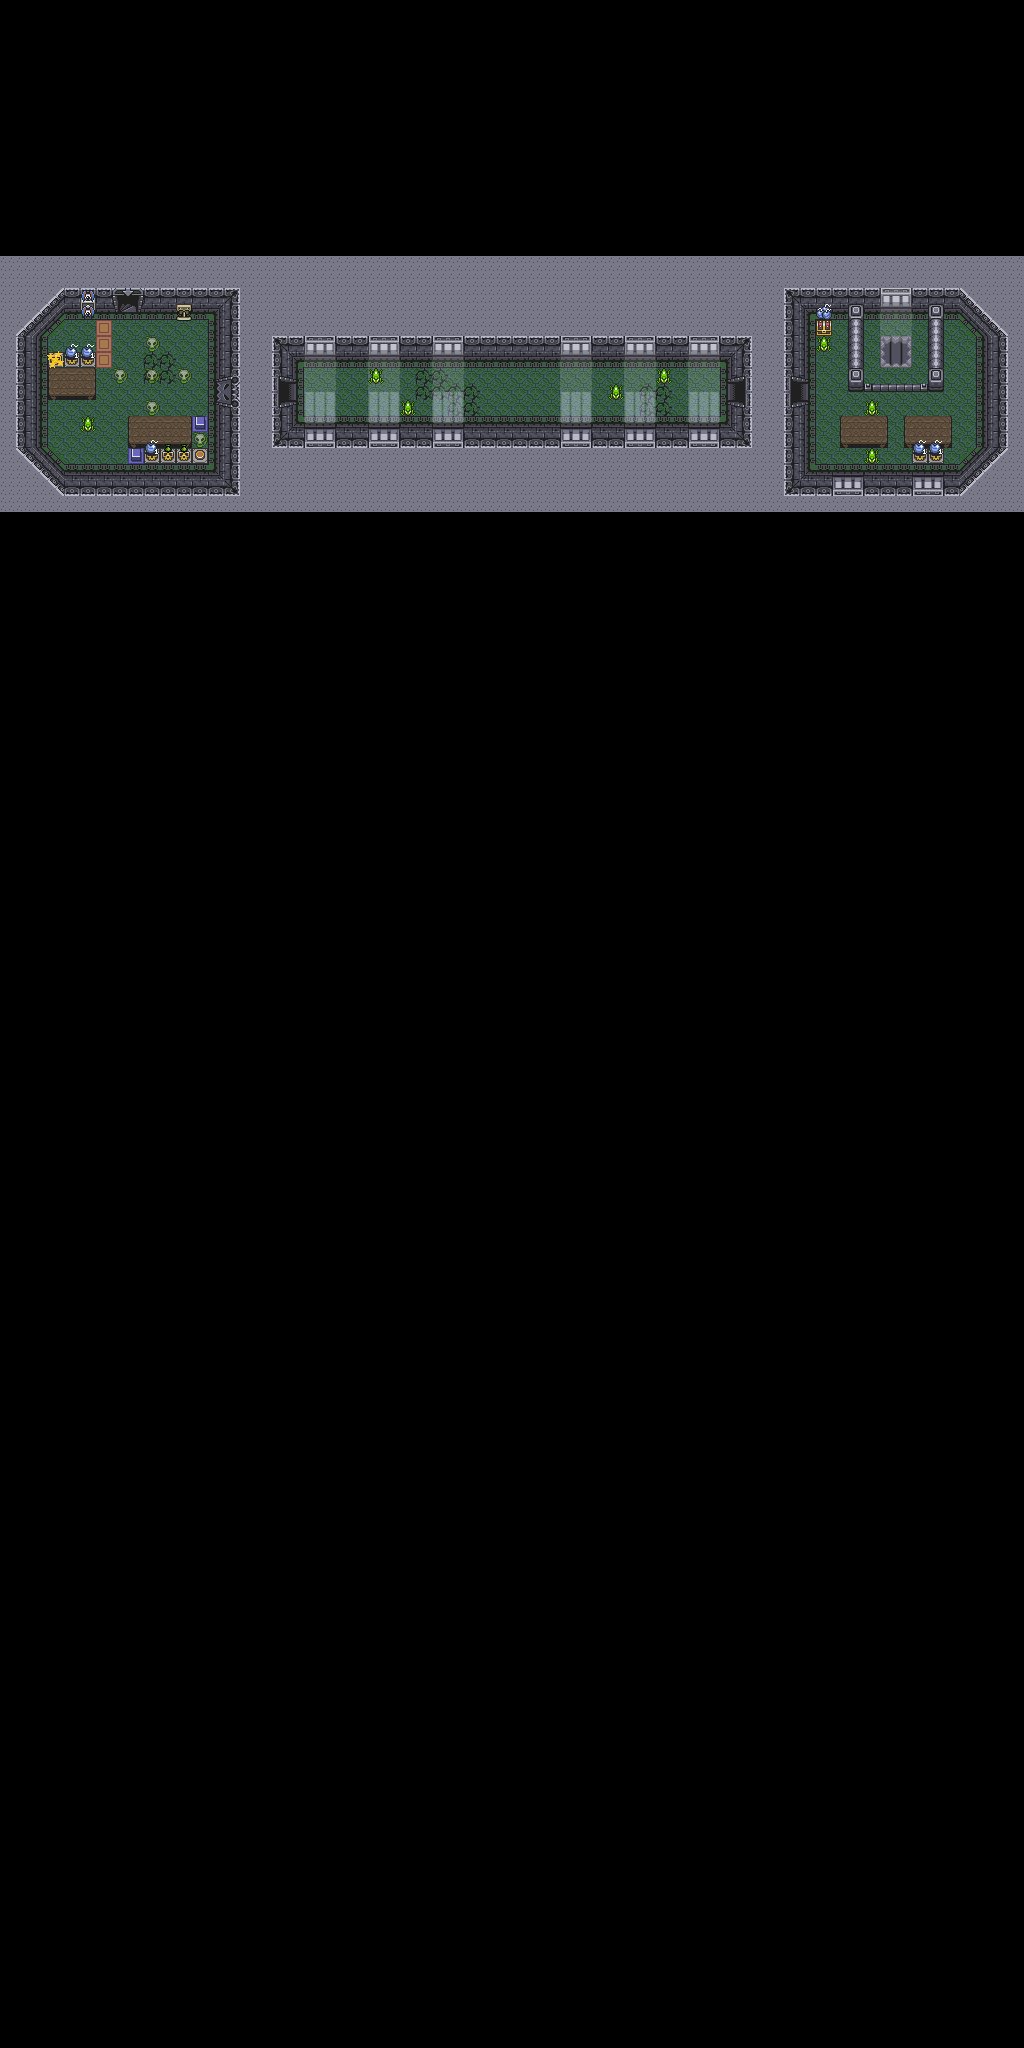
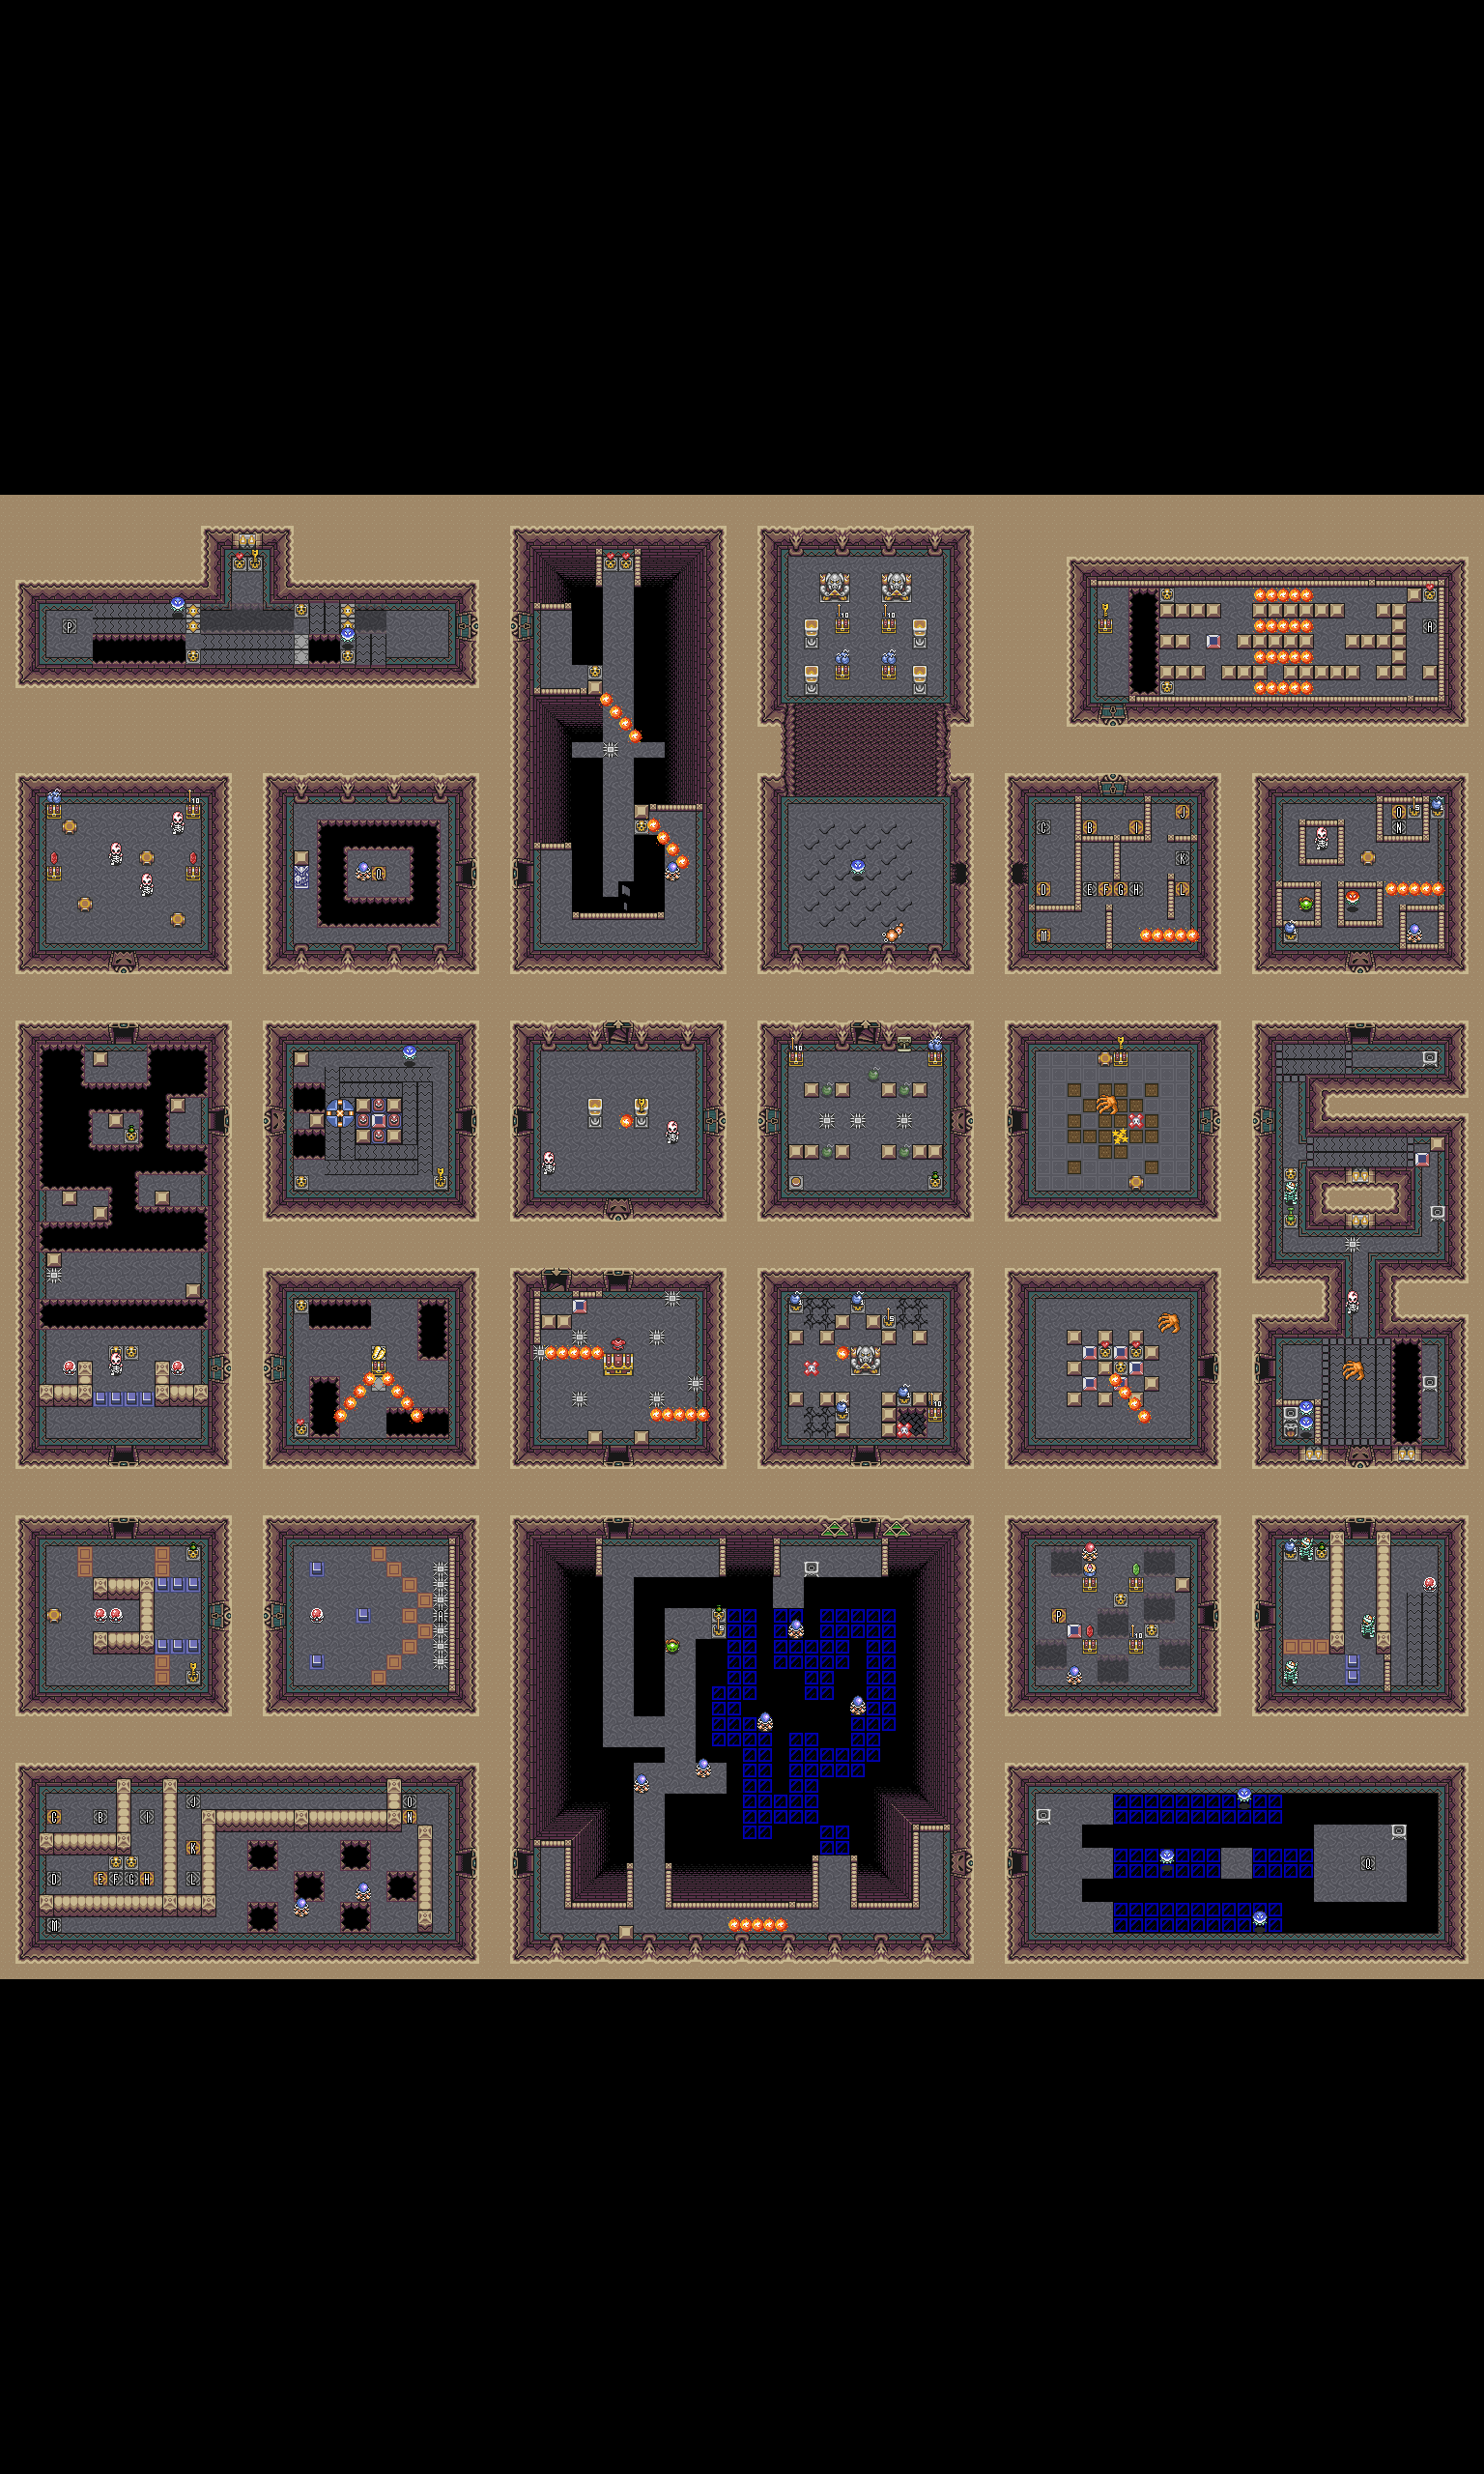
Dungeon floor maps 8 floors
Choose a floor, then enlarge its map. Stairs, treasure chests and passages are annotated on the original game maps.
DARK WORLD · Two torches, an opening, a silver arrow.
The Final Battle
Before you set outSilver Arrows · Improved sword · Lantern or Fire · Magic
RewardsThe Triforce and the credits
Before jumping into the Pyramid, refill your healing and keep a reserve of magic. Check the Silver Arrows in inventory.
Strike Ganon with your sword when he stops moving. Dodge the trident instead of chasing him during a teleport.
Move away from the circle of fire then dodge the bats. Stay away from the edges when the ground starts to disappear.
Light both torches. While Ganon is visible, strike him with the sword to stun him, then immediately shoot a Silver Arrow. Relight the torches and repeat until he falls.
After his defeat, take the northern passage. Watch the credits; Site tracking remains available to finish your collections.
A hint for this chapter +
In the last phase, the sword alone does not end the fight.
Reveal the solution
Relight the two torches, hit Ganon with your sword to immobilize him then immediately shoot a silver arrow. Repeat this cycle.
THE BOSS Ganon ↗
Avoid trident, fire bats and disappearing borders. The torches make Ganon visible and vulnerable in the last phase. A fall forces you to start the fight again.
Progress saves automatically in this browser. This guide’s steps and map discoveries are included in “Take your progress with you” below. The earlier collection counters remain separate.
03 / BEYOND THE ENDING
One last treasure chest may be waiting.
For 100% completion, check all 24 Pieces of Heart, four bottles, optional tools, weapon upgrades, armor and carrying capacities. Marking a location does not confirm that every dungeon treasure chest is open. Use the floor maps for a final check.
Do you play on GBA? The comparison below tracks GBA bonuses separately. The maps and guide above cover the Super NES version; some puzzles, especially in Ice Palace, differ on GBA.
Collection field guide
Plan your final discoveries.
Use these routes alongside the edition-specific counters. The references link to individual locations and additional maps.
A final circuit through both worlds
01
Use the interactive map to finish the twenty-four heart pieces and four bottles. Return to previously blocked caves with the Titan's Mitt, Hookshot and Flippers.
02
Check optional equipment as well as hearts: the Magic Cape, Cane of Byrna, Magic Powder, medallions and capacity improvements have their own uses.
03
Temper the sword with the reunited blacksmiths. After the required crystal progress, escort the Super Bomb to the Pyramid and use the fairy's upgrades before the final battles.
Complete both A Link to the Past and Four Swords on the associated save, then pay the gatekeeper at the Pyramid's eastern entrance. Bring healing, magic and Silver Arrows.
02
Clear the four branches and collect their blades. These rooms use GBA mechanics, including diving; the Super NES floor plans do not describe them.
03
Pull Arrghus II's smaller enemies away with the Hookshot. Break Helmasaur King II's masks and finish the exposed eye with a Silver Arrow. Identify the real Mothula II among its copies.
04
Against Blind II, return the detached heads to the body with sword hits. After collecting all four blades, enter the final chamber and fight the four Dark Links in succession, adapting to their added spin, jumping and rushing attacks.
Use paired Light World and Dark World sweeps to finish the inventory.
This is a collection roadmap with editable counters and links to detailed locations. The bar measures completed checklist goals, not a percentage read from your game save.
Original adventure.
Choose your adventure
Compare editions & modes.
See what changes before choosing your checklist. Each column uses the edition’s own collection targets.
SNES
Original adventure.
Game Boy Advance
Linked Four Swords bonuses are tracked in addition to the original adventure.
These are checklist targets, not an overall completion percentage. “Not included” means the goal is absent from that checklist. Hardware-dependent extras and additional runs are listed below.
Collect nearby rewards whenever a new tool opens a route.
Complete the seven crystal dungeons, then revisit both versions of each region.
Finish weapon, magic and carrying upgrades before Ganon’s Tower.
0 / 8 collection goals completed
Saved separately for this edition, in this browser.
Finish the main story
Follow the story chapters above, take every boss reward and reach the ending.
One file for all games, editions, map marks, story checklists and the N64 companion. Download it on the old address, then import it on the new one. Nothing is uploaded.
Sources for this edition
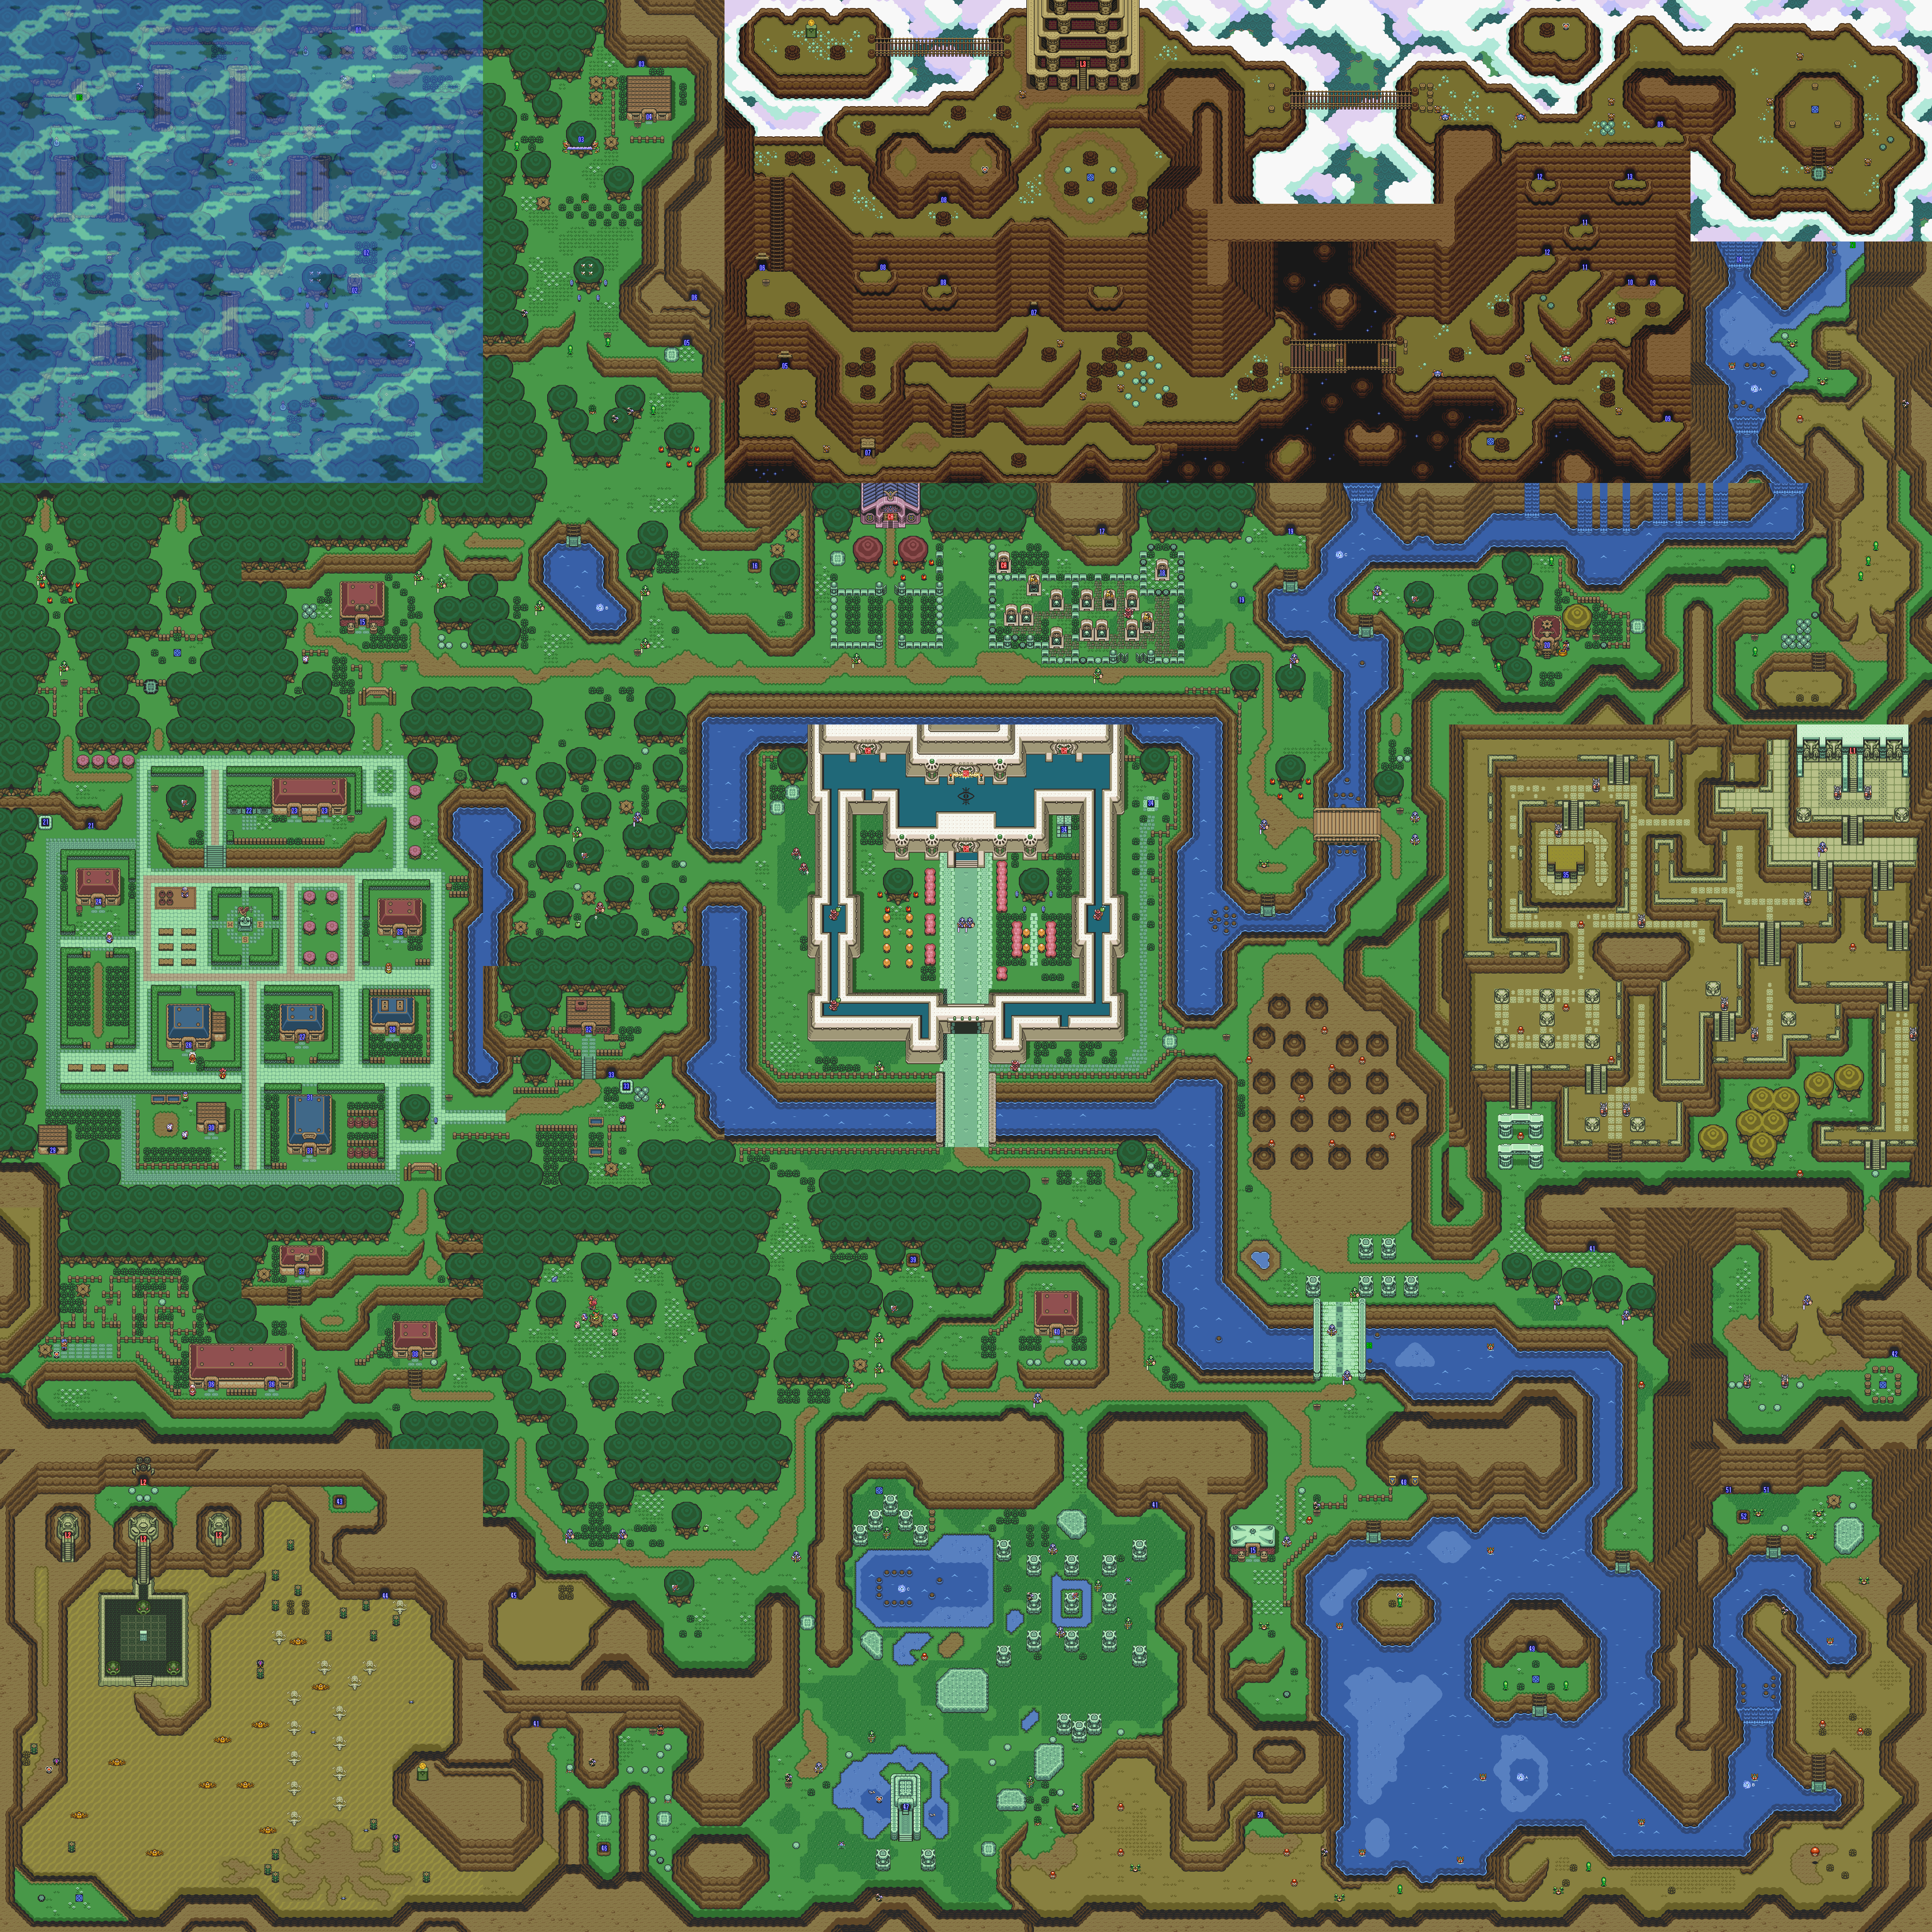
This archive’s guide draws on game mechanics, maps and the references linked in each chapter. Outside locations are marked on the 4096 × 4096 world maps; these markers do not show individual dungeon rooms.